Step by step to deploy D365FO with Azure DevOps

Dynamics 365 Finance & Operations is a cloud-based or on-premises Enterprise Resource Planning (ERP) system. It’s a resourceful environment to manage finances and inventory for small and large companies. Azure DevOps is a platform that provides automated tools for the end-to-end software life cycle management. In this article we will show you how to deploy Dynamics 365 Finance & Operations features using Azure DevOps Pipelines and Microsoft Dynamics Lifecycle services.
Azure Configuration
- Create a service account
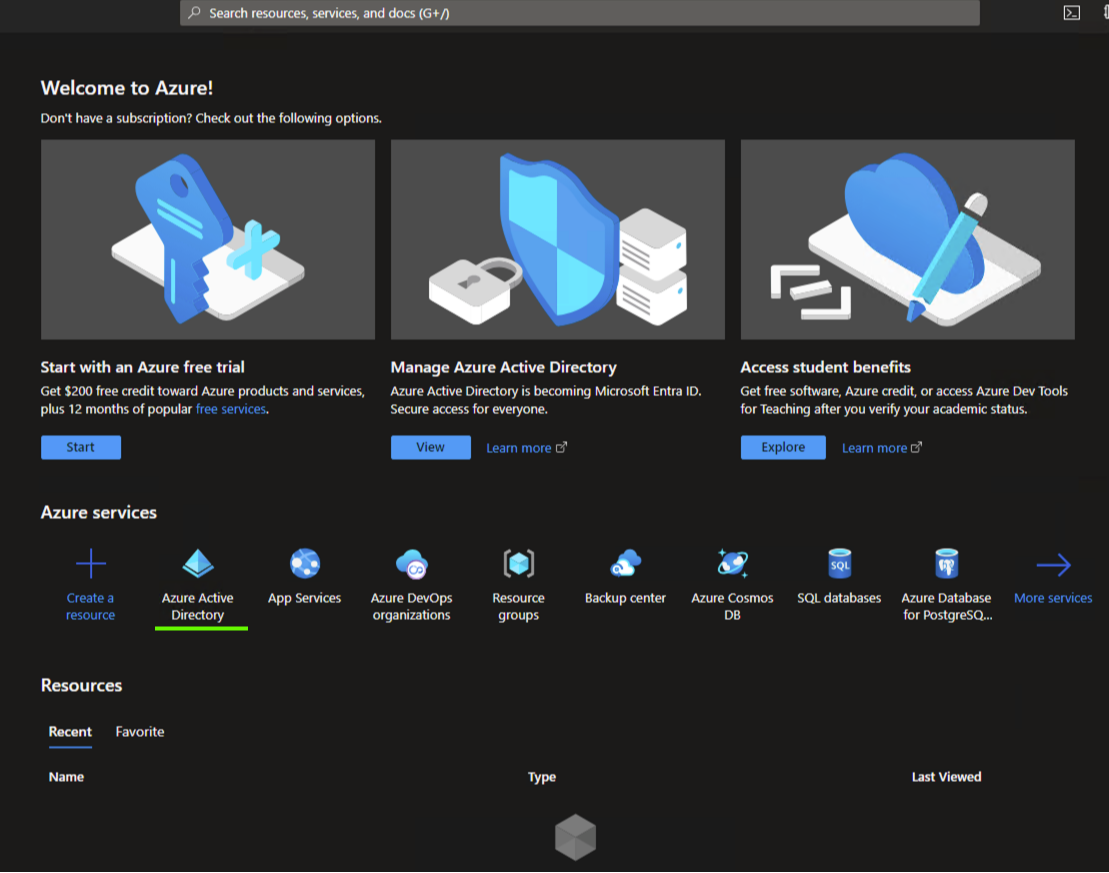
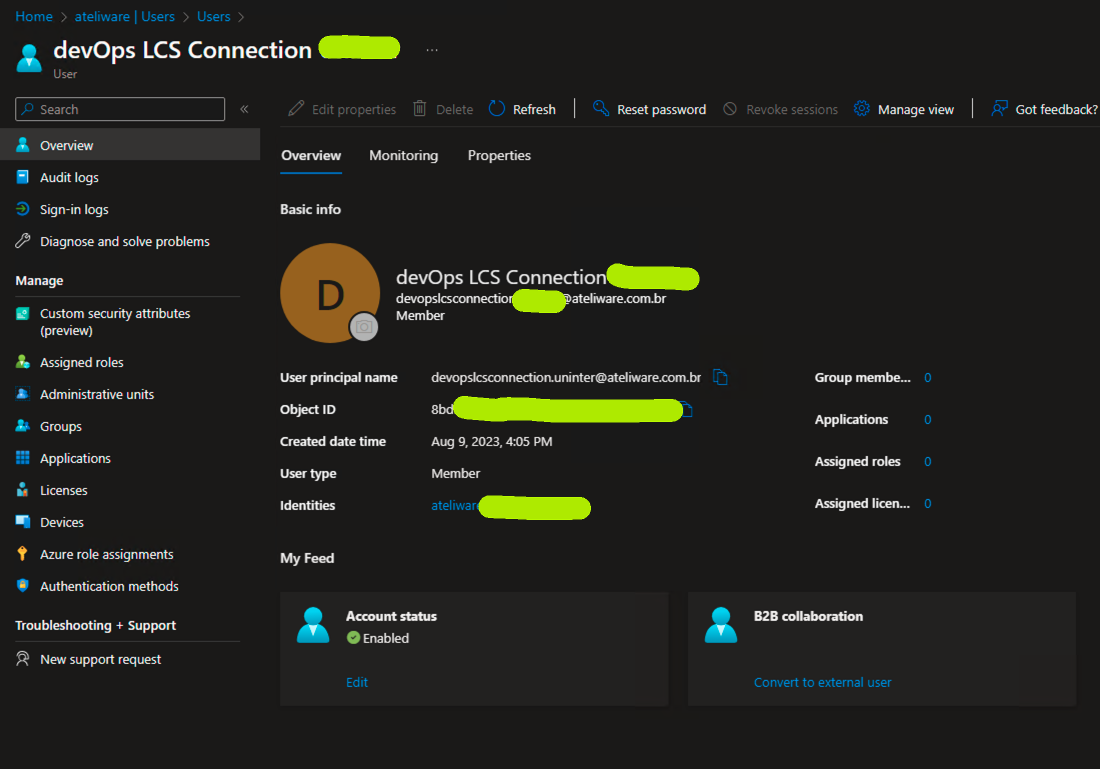
The first step is to create a service account in Azure Active Directory (AAD). The account password must not expire and validations such as MFA must be disabled. In our case, we created an account that refers to the role it will perform to facilitate identification.
- Create an App registration
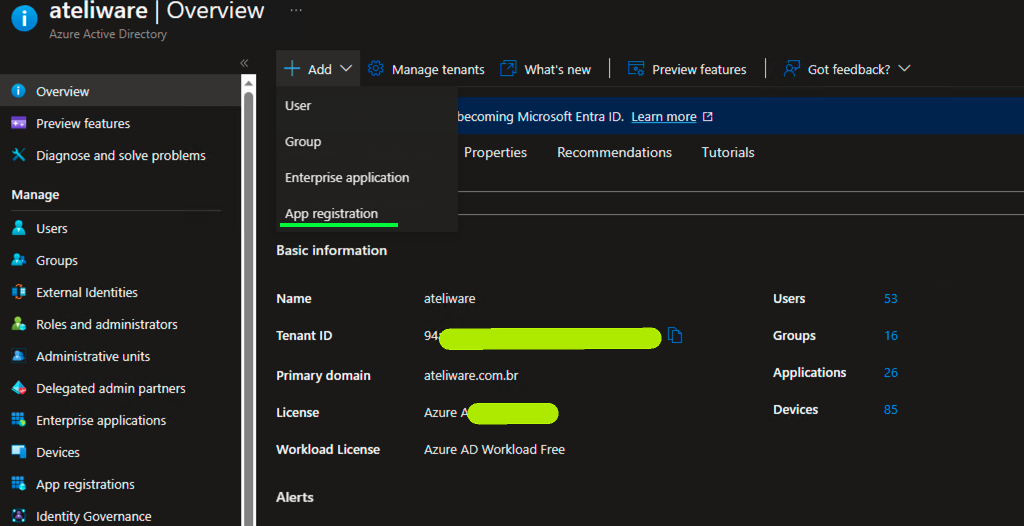
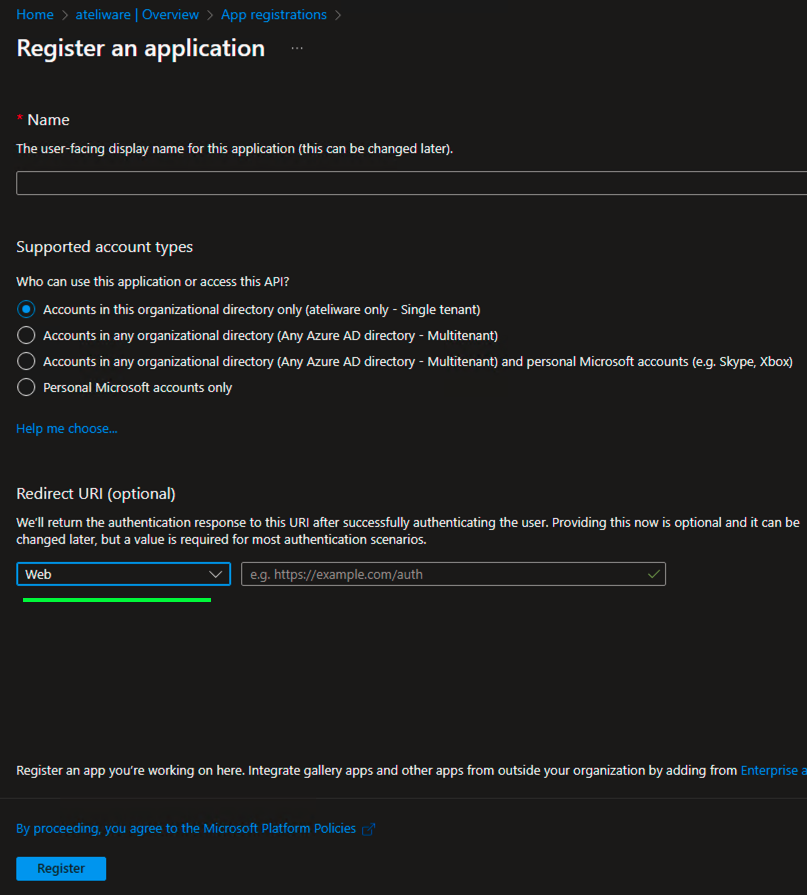
The next step is to create an app registration because the Microsoft identity platform performs identity and access management (IAM) only for registered applications. On the AAD screen add a new app record.
Use the name you prefer, leave the single tenant option checked and change the URI to web.
When the register process is finished you will have the information referring to the record created, but more configurations must be carried out.
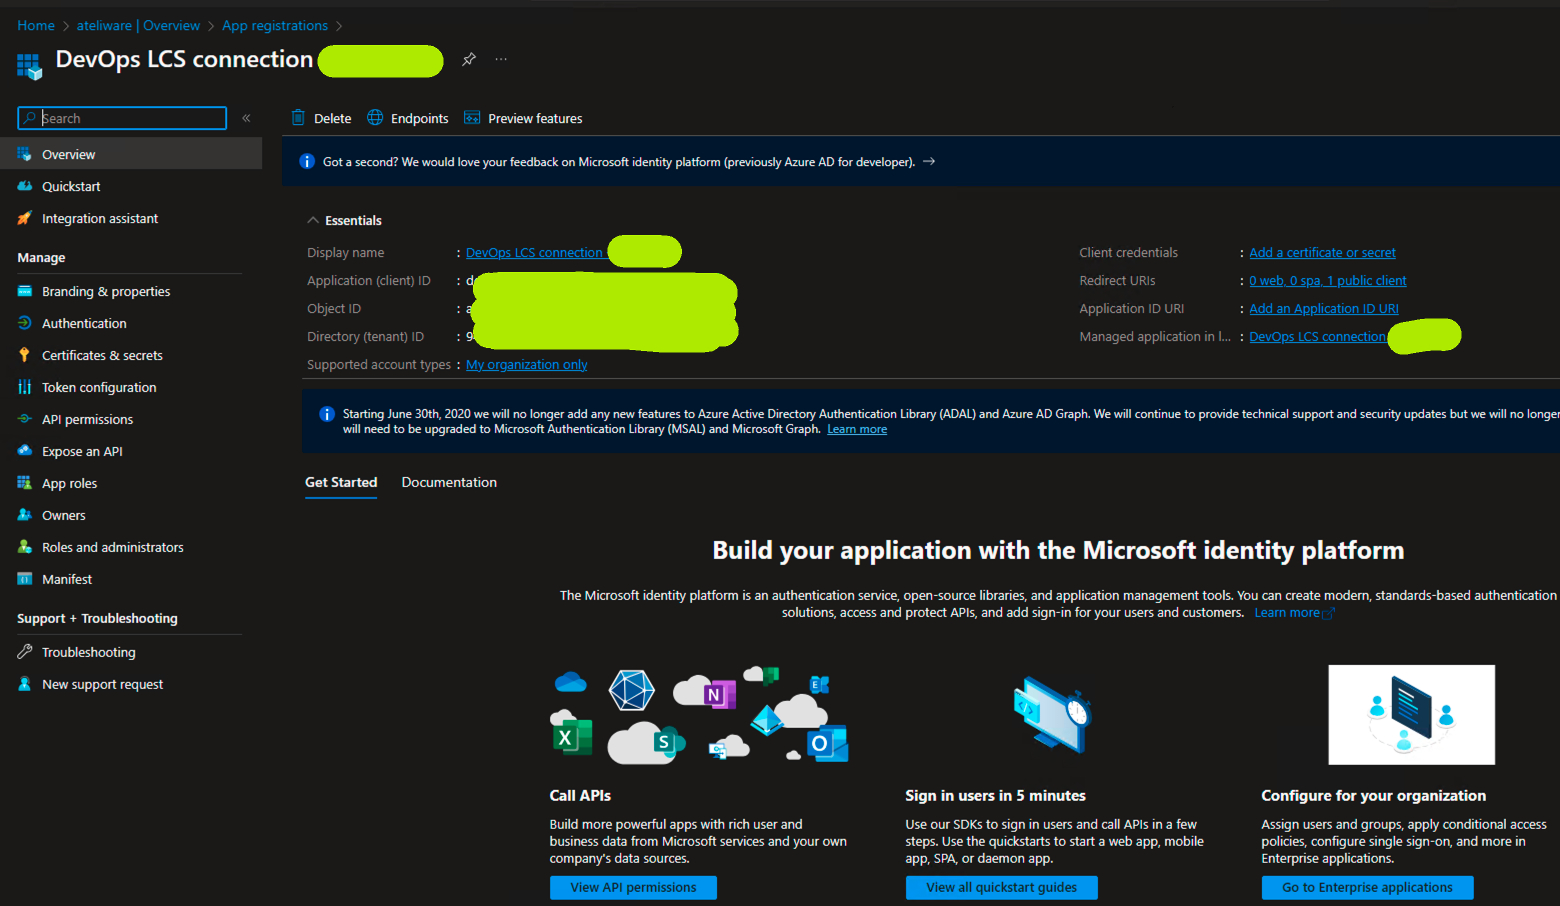
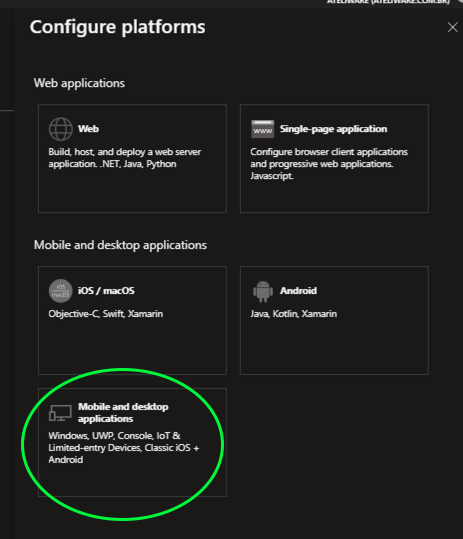
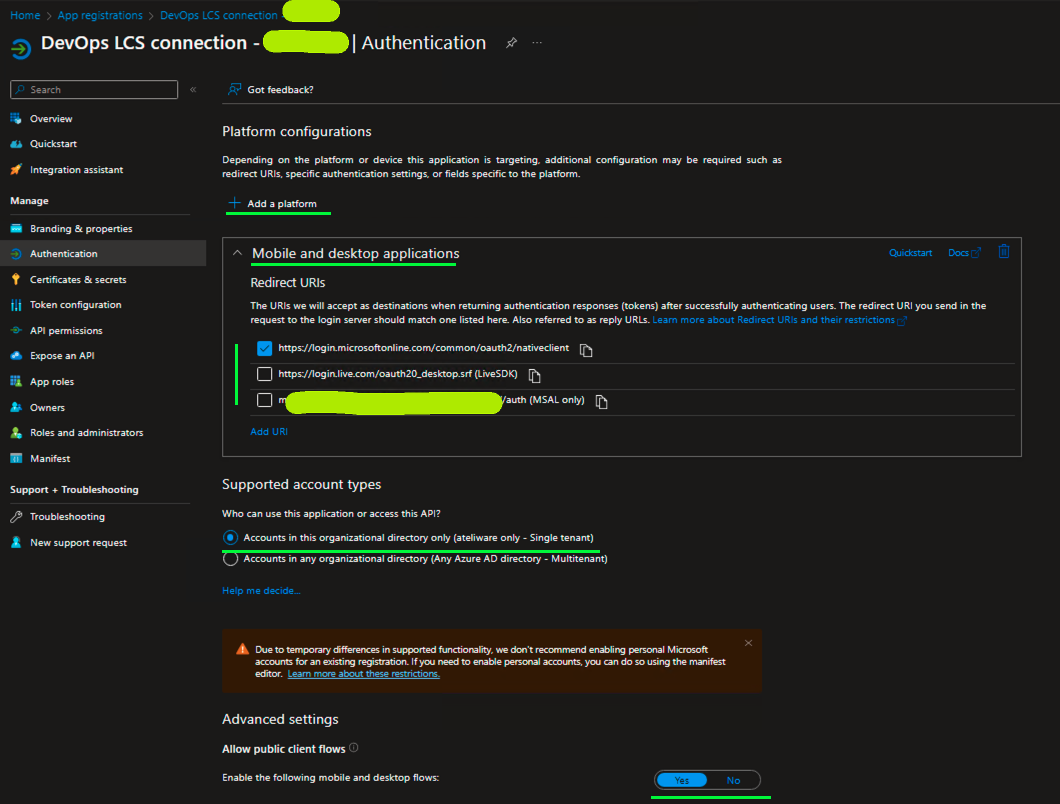
In the Authentication menu, add the platform Mobile and desktop applications and select the authentication URI. Set accounted support types to a single tenant and allow public clients to flow in advanced parameters.
In the API permissions menu add the Dynamics Lifecycles services permission and grant admin consent (This step must be performed by a user with admin privileges for example).
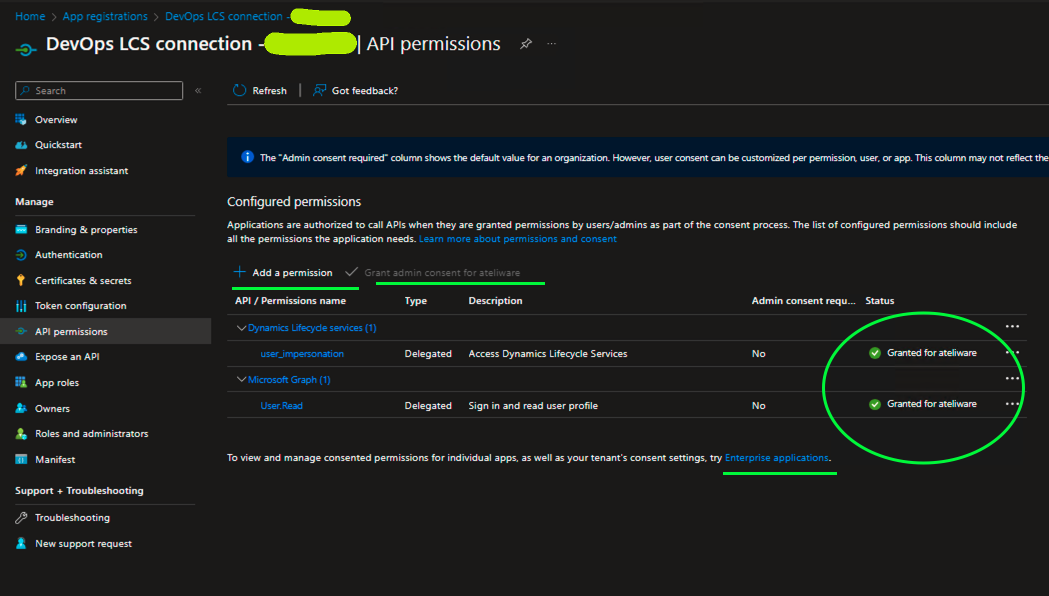
The screen to grant admin consent to LCS can be accessed with the Enterprise Applications link at the bottom of the screen.
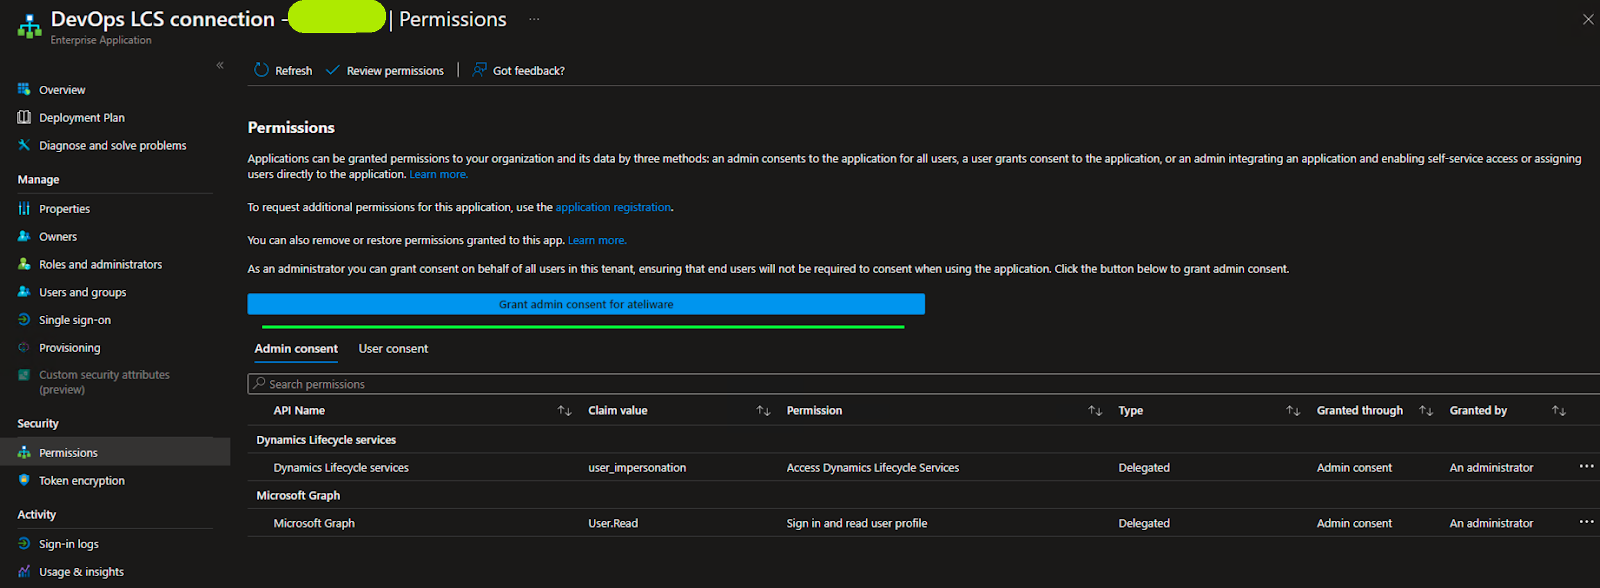
Now you have all the permissions needed for the next steps.
LCS configuration
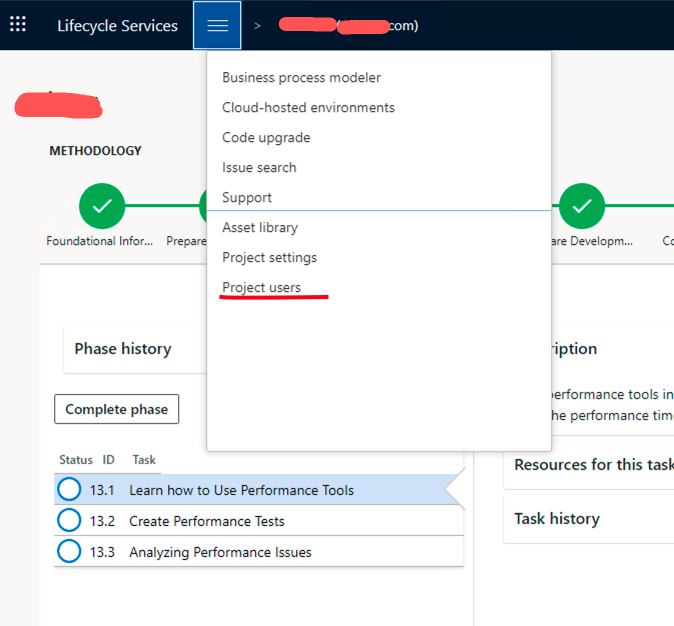
The LCS configuration is simpler, just add the service account created in step 1. This account will be responsible for authentication. Access the LCS and in the project menu add the created account.
Remember to grant the correct permission to the user and log in once with his account in the LCS workspace for the registration to complete. If you do not login with the account ,the user registration will remain pending and not accepted like the image below.

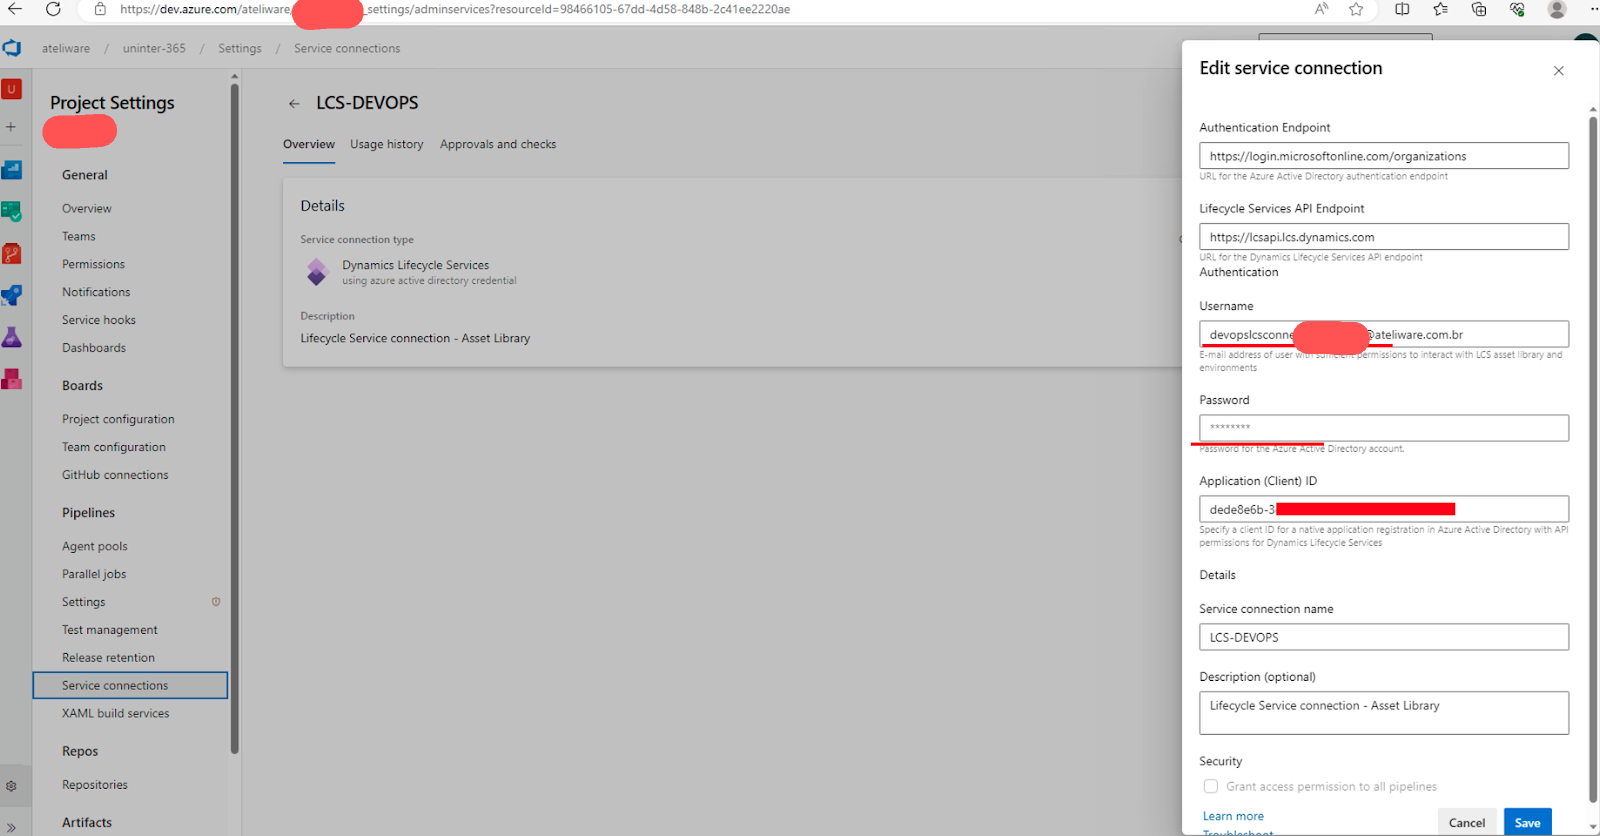
DevOps connecting Service configuration
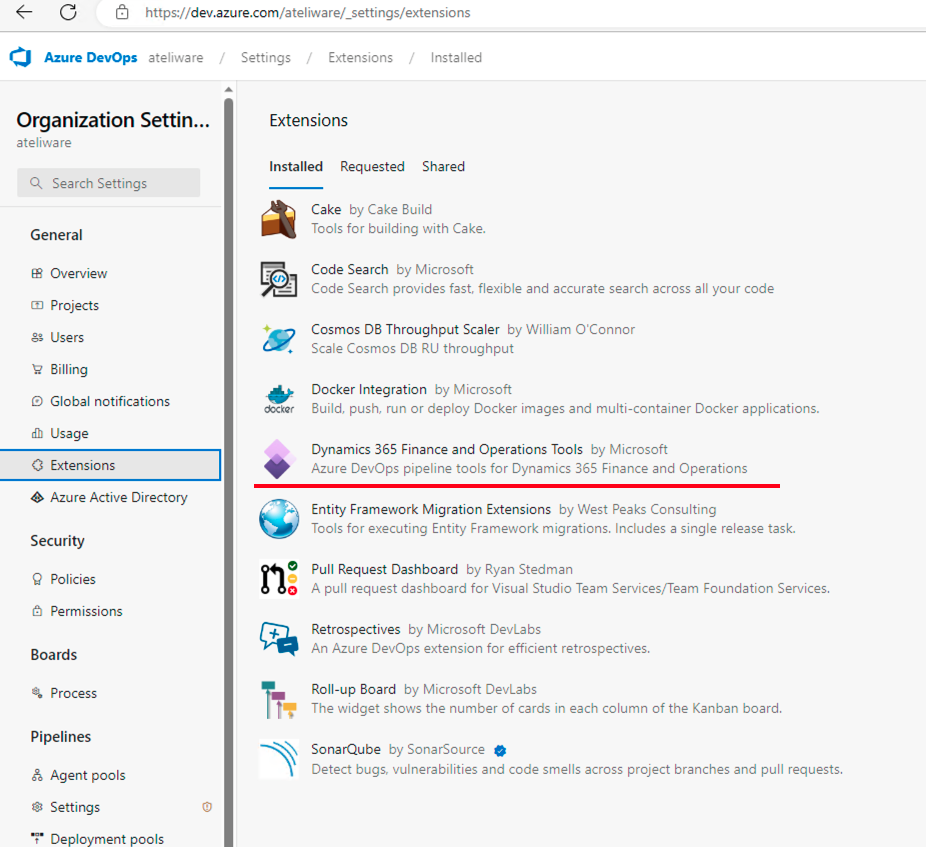
This step requires the service account (step 1) as well as the application (client) ID from the application registration (step 2). It is also necessary to install the extension “Dynamics 365 Finance and Operations tools”. Access the extensions menu in the DevOps page and install it.
Go to project properties and in the service connections menu select the LCS service.
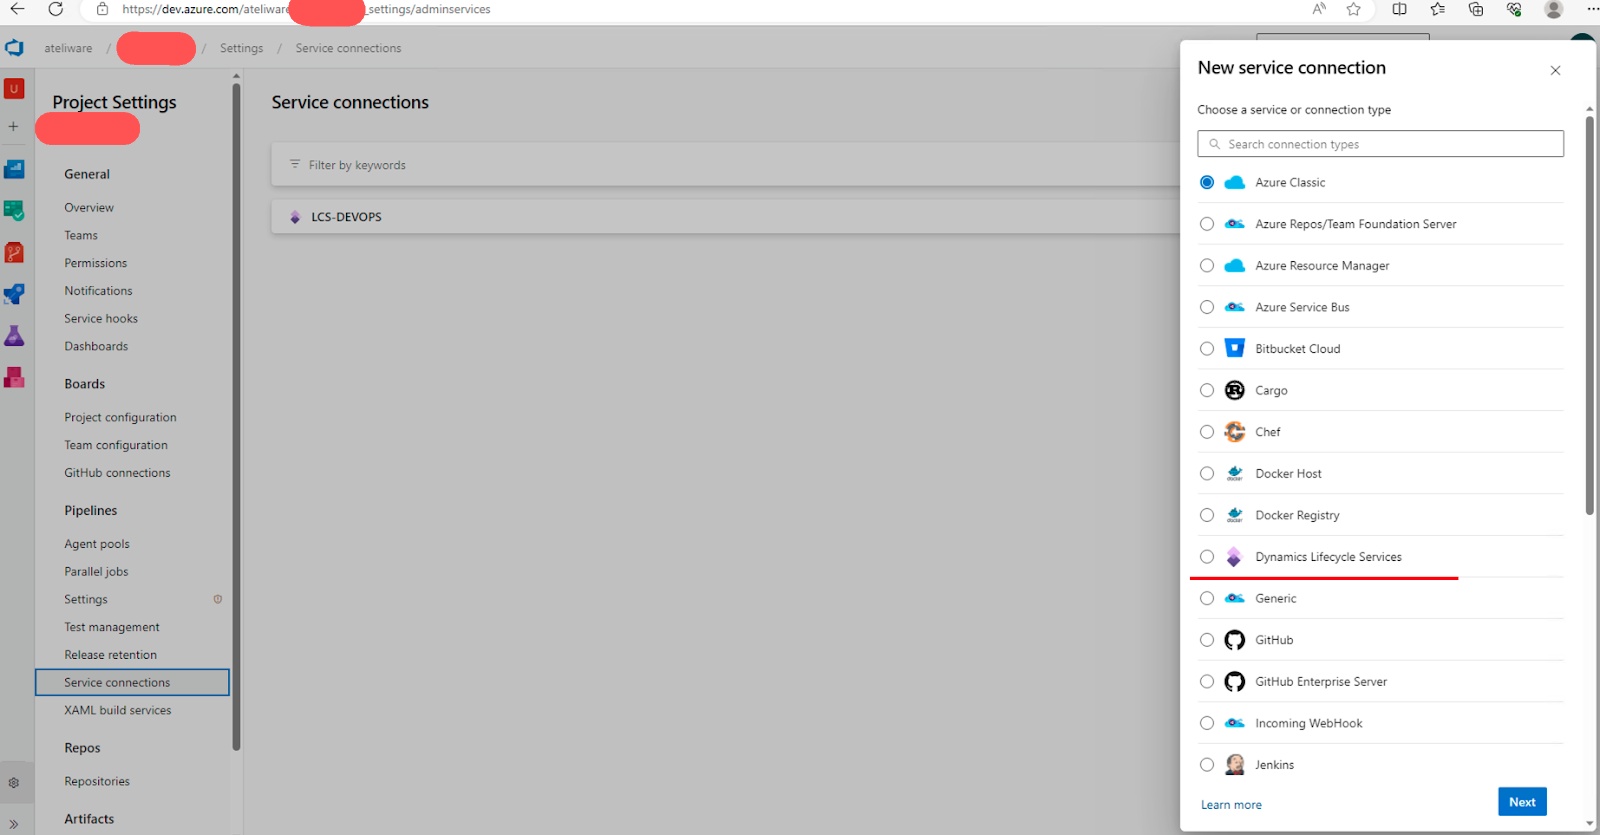
Fill in the connection parameters : service account (step 1) and application (client) Id (step 2).
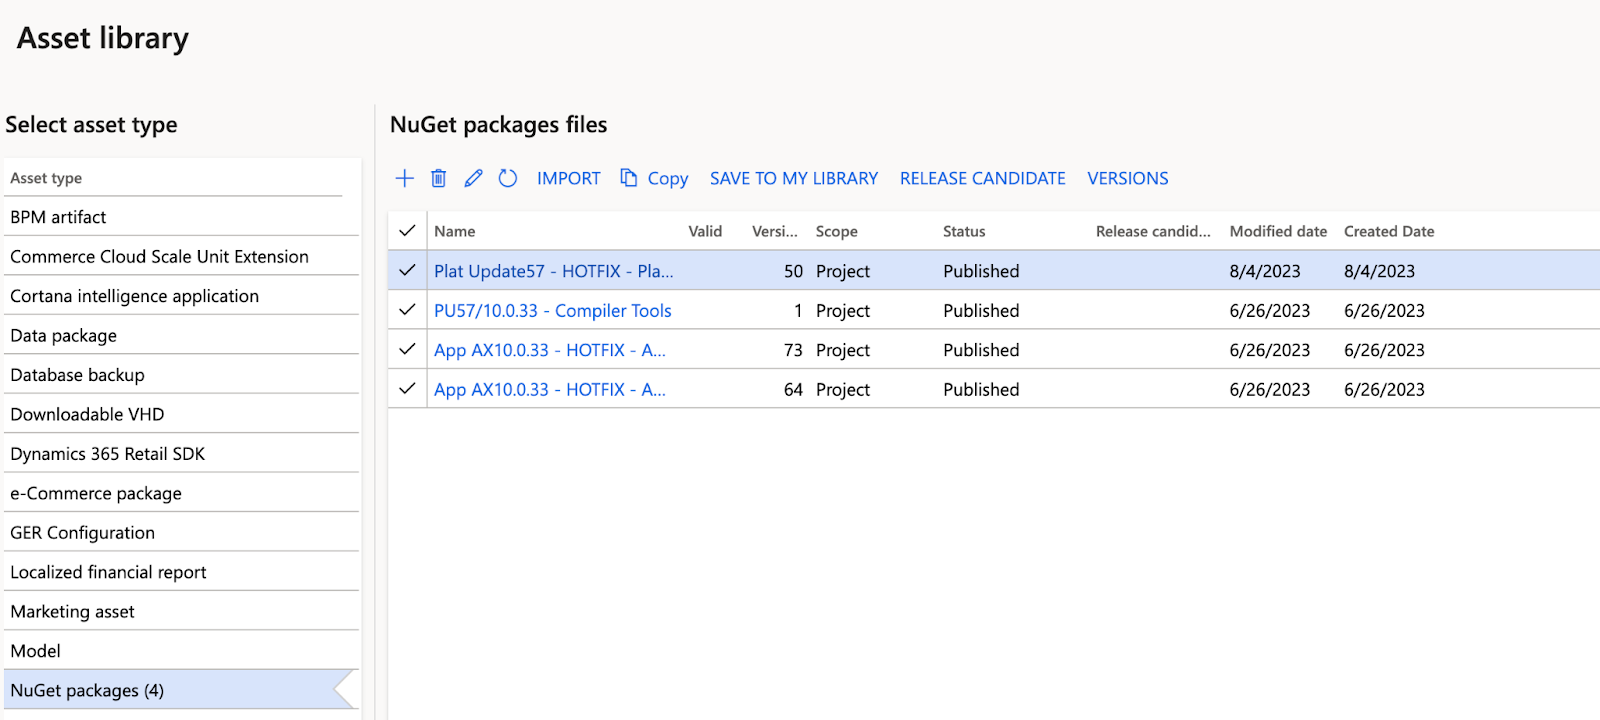
Artifacts Configuration
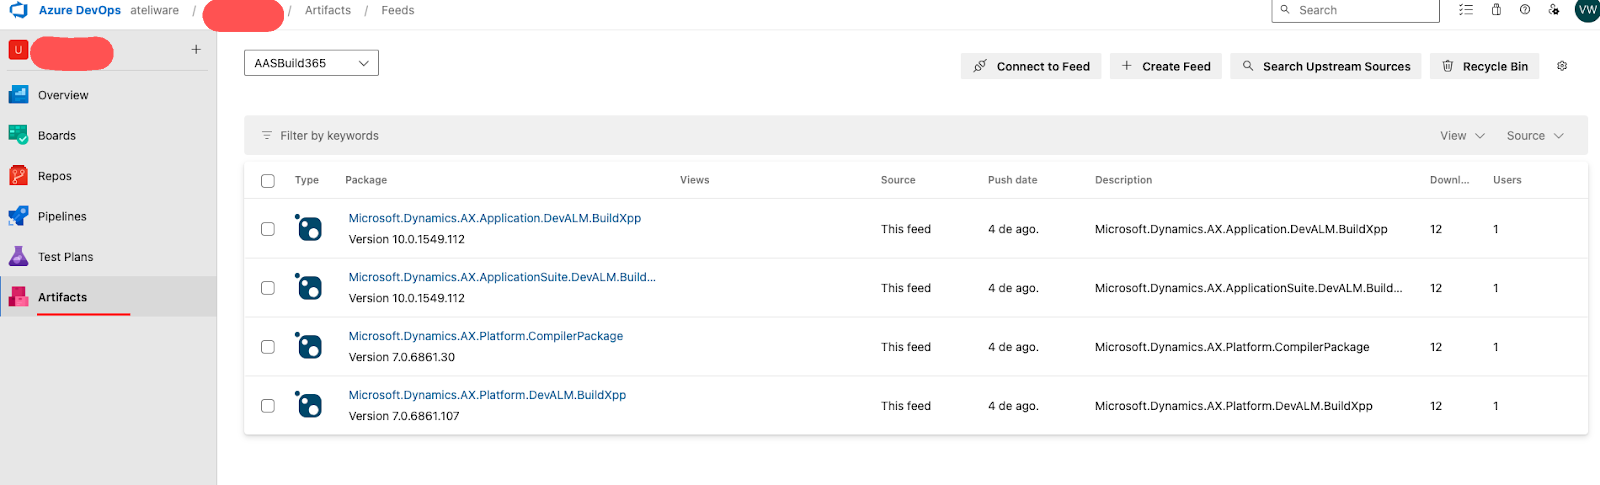
Azure DevOps uses NuGet as a package manager. This NuGet as a Service is called Azure Artifacts. It is used to generate the build package that will be sent to the LCS. The first step is to download the packages from the LCS’s Shared Assets Library menu. It is necessary to download the 4 packages described below. Remember that they must have the same version of the environment you want to deploy.
The next step is to create a feed in the Artifacts menu and connect this feed. This page will show the nuget.config file that should be copied to the folder where the NuGets files were downloaded. The nuget.exe file and the credential provider (script) must also be downloaded through the get tools link.
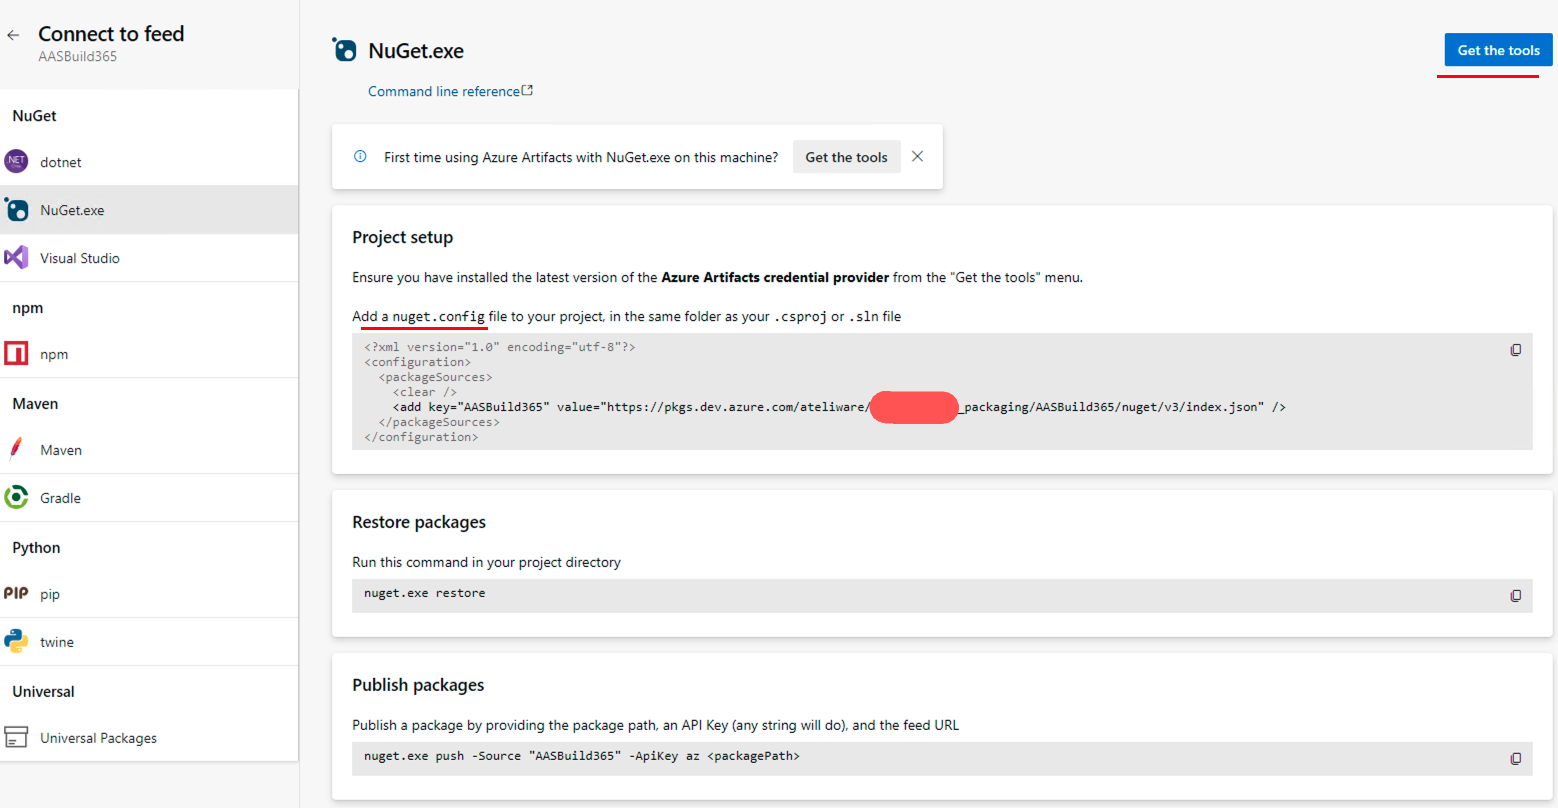
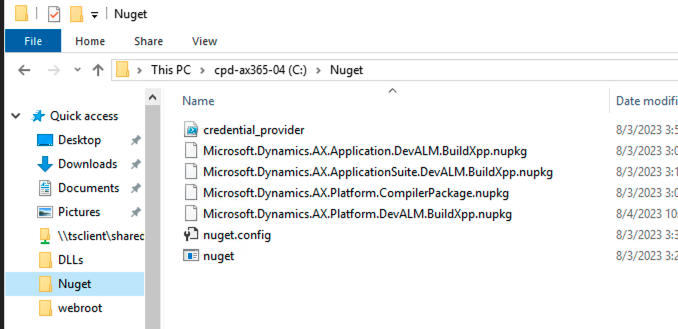
I saved everything in one folder named Nuget, but if you decide not to , remember to fix the paths. Run the credential_provider script as an administrator to set the credentials to access the azure artifacts.
In Visual Studio go to the tools menu and open the package manager console.
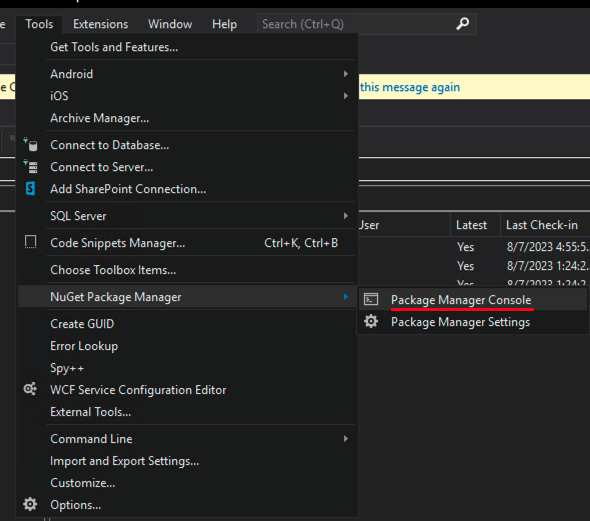
It will open a terminal. Set the cursor to the NuGet folder that was created in the previous step and publish the 4 files with the command below.

As a result, the Artifacts page will look like this:
Pipeline creation
Now we will finally start the pipeline configuration. Azure Pipelines combines continuous integration, continuous delivery, and continuous testing to build, test, and deliver your code. Before start, do the setup below:
- Define which branch will be deployed;
- Create a folder called “build” in the branch;
- Create an empty solution in the “build” folder, e.g. (In my case, I chose AutomaticDeploy).
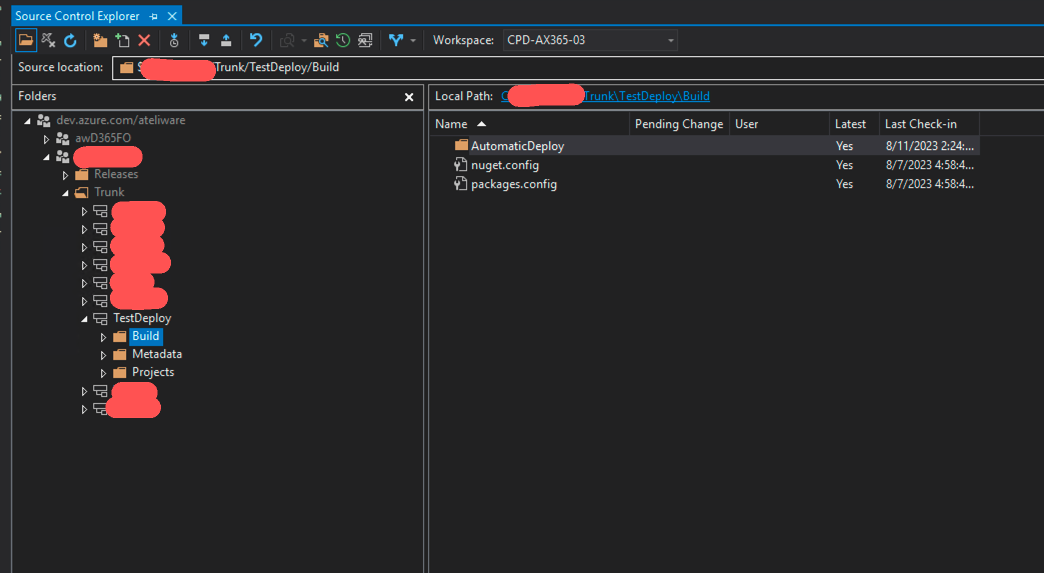
Copy the nuget.config file that is in the NuGet folder to the build folder. Create and copy it to the same folder a file called “packages.config” which must contain the version of the NuGet files published in artifacts too.

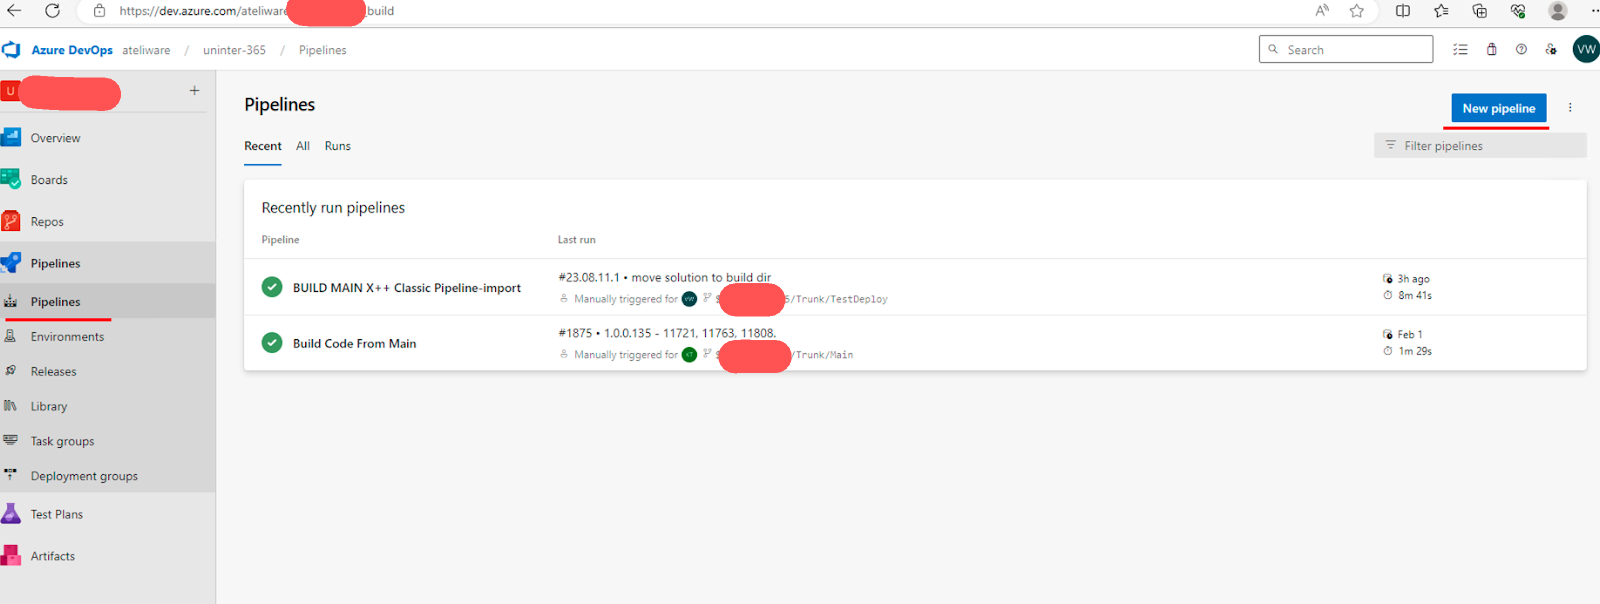
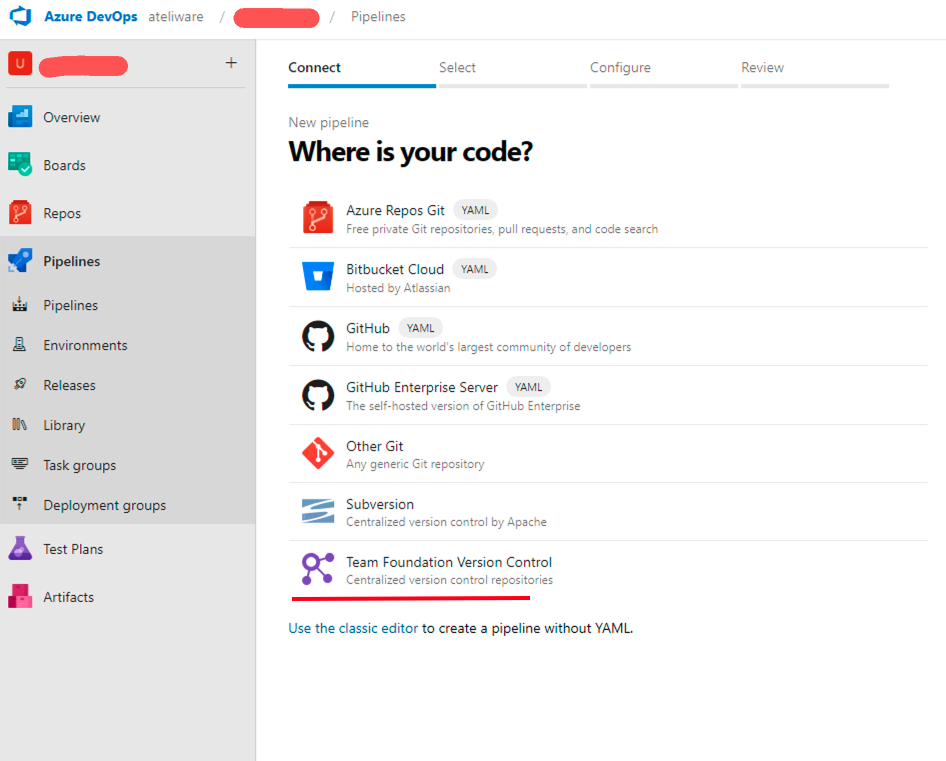
After this step, create or import the new pipeline in the pipeline menu. If you want to import a base pipeline, Microsoft has a template repository. After that, choose the repository your code is maintained, in my case the TFVC.
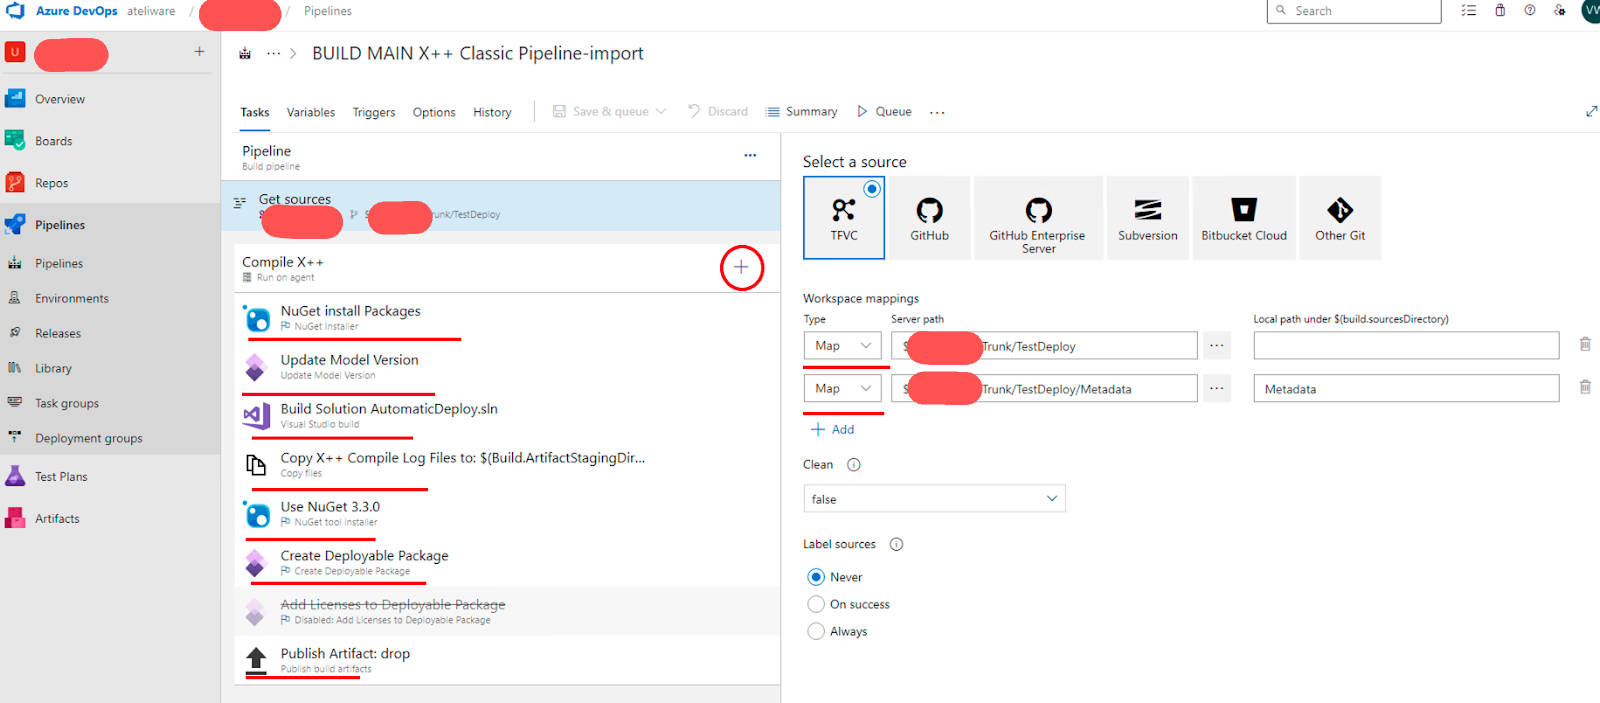
The pipeline tool contains several tasks that can be chosen to be implemented. In this case, it will build the solution and create a release to send it to LCS. The pipeline consists of the following tasks.
- Get Sources: Select the branch that will be built. And add tasks to the pipeline.
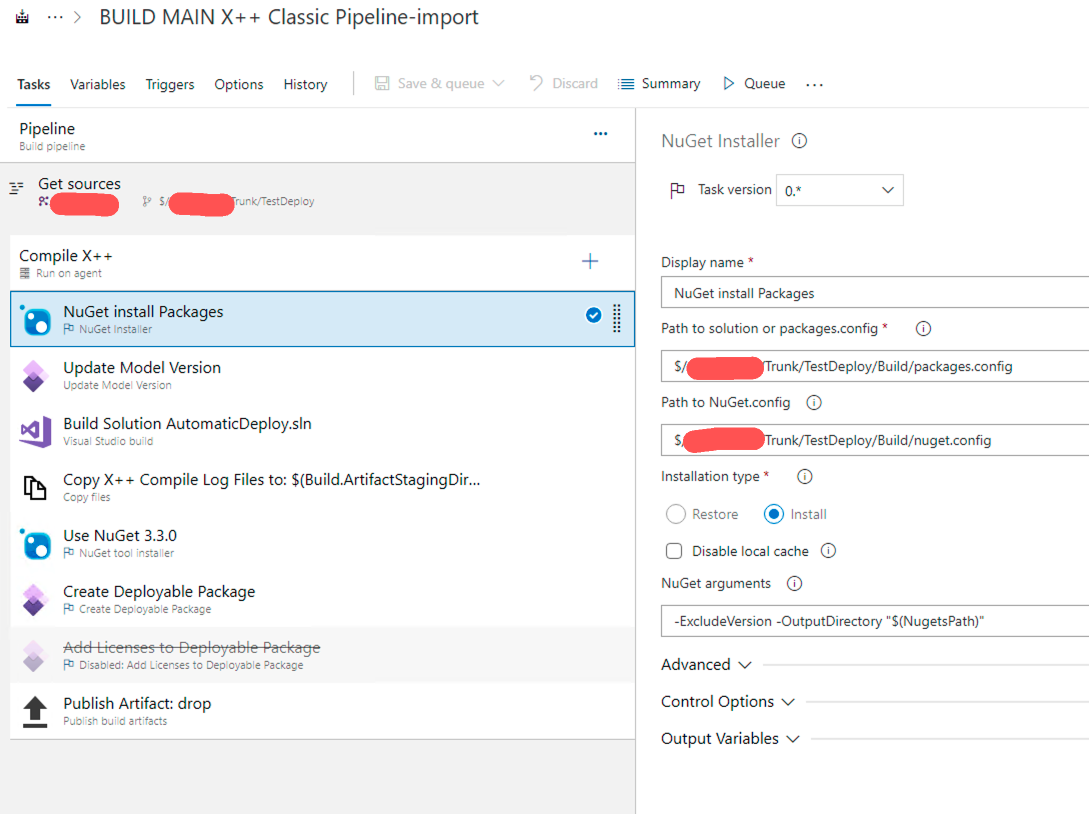
- Nuget Installer Packages: This step gets the packages from your artifacts feeds and uses the config files we have uploaded to the Build folder.
- Update Model Version: Helps differentiate the model metadata in the deployable packages and tie them back to their originating build definition providing end-to-end traceability of the code changes.

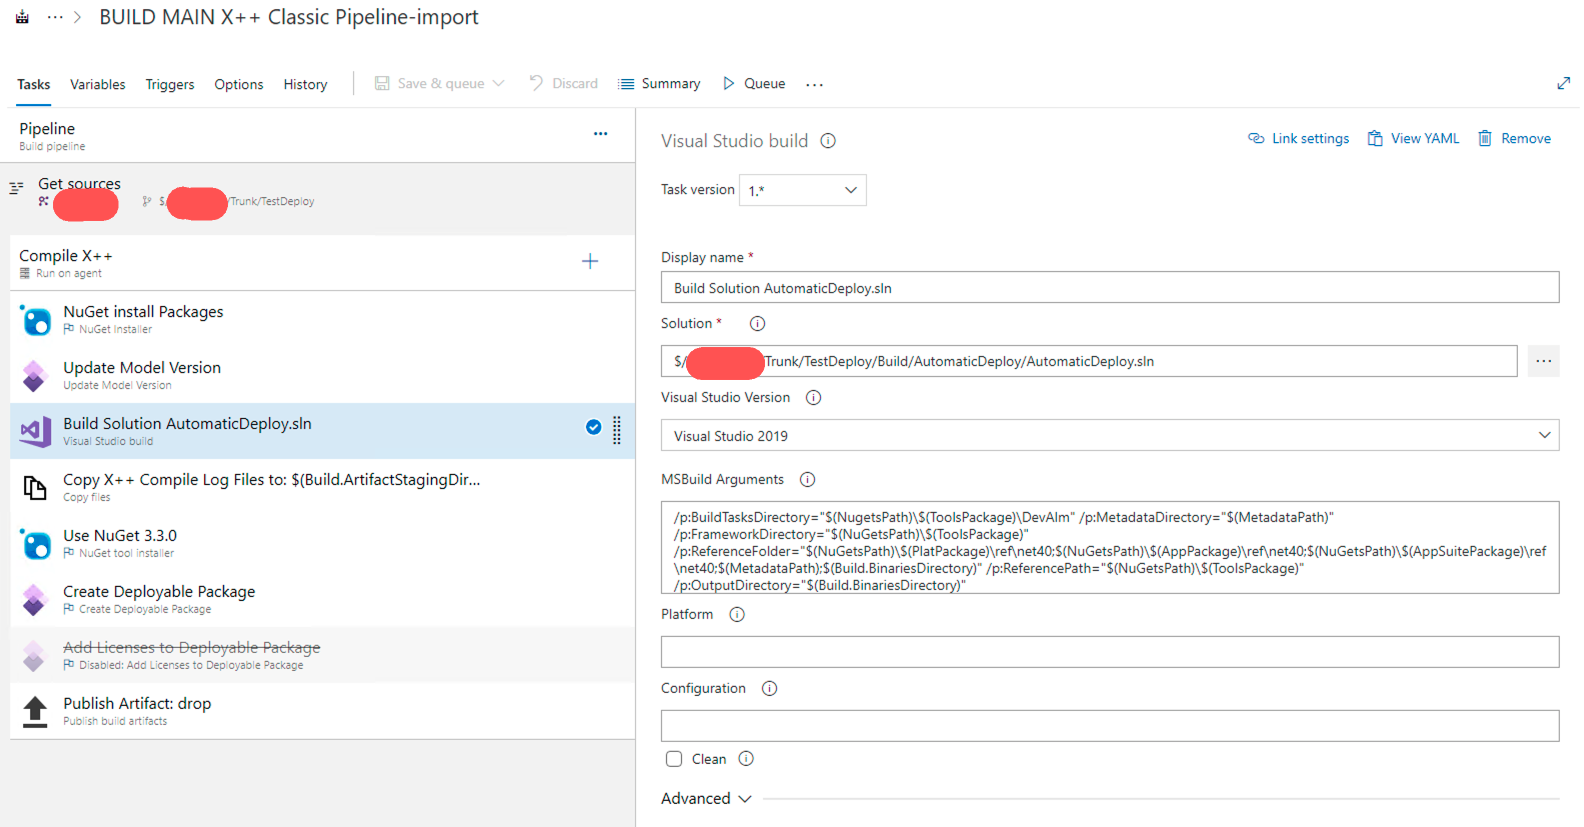
- Build Solution: It will get the empty solution and build it with the latest changes.
- Copy Compile Logs: Like the name of the task already says, it will save the logs for each build.
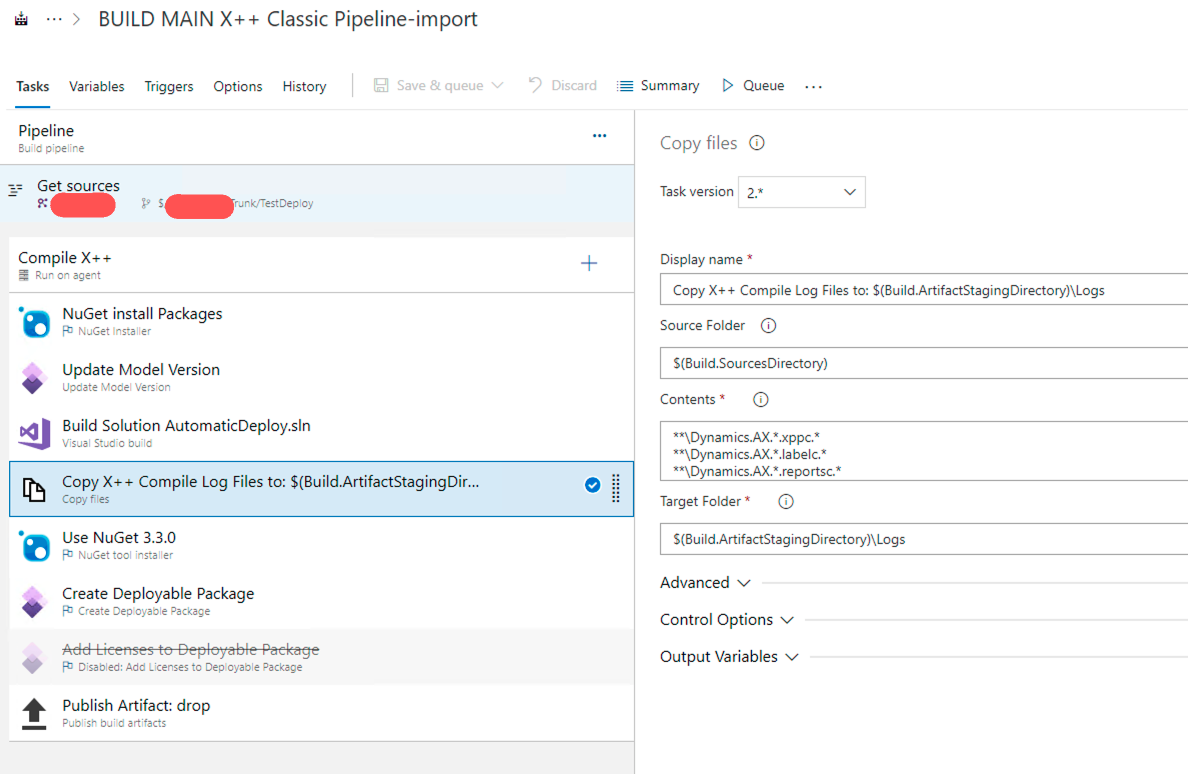
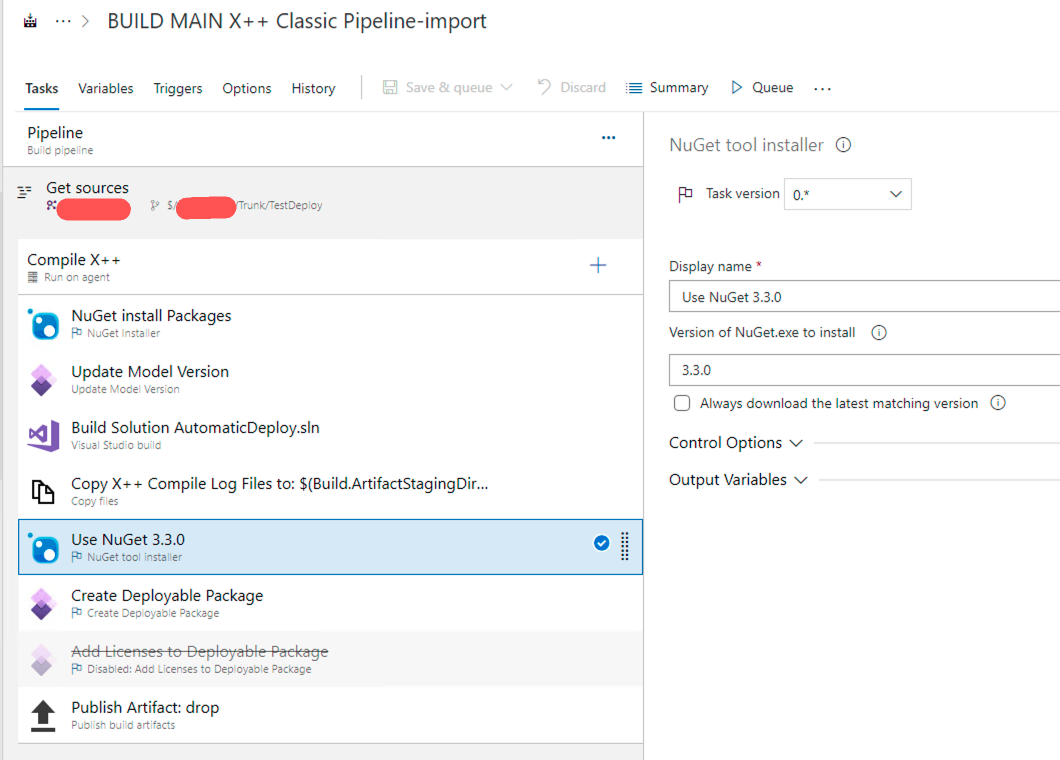
- Use Nuget: Install the latest version to create the deployable package.
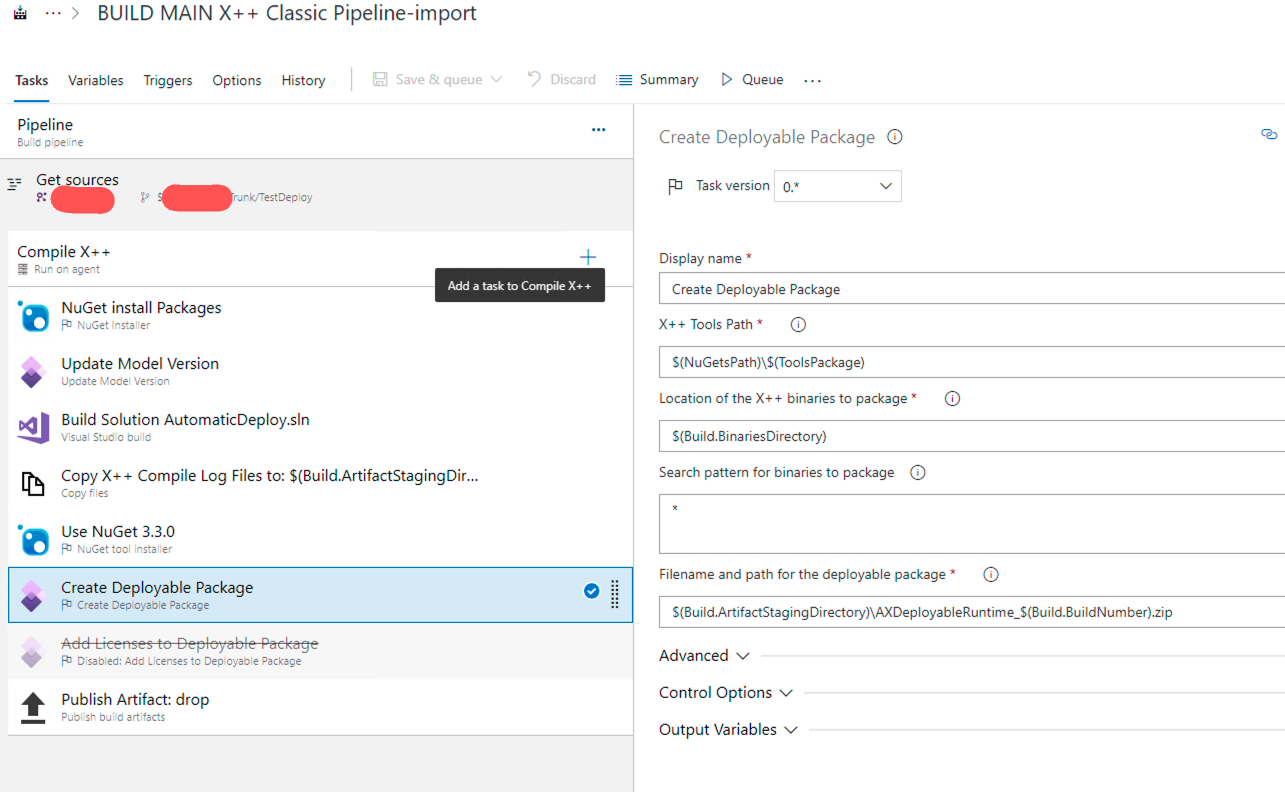
- Create Deployable Package: Use Nuget to create the deployable package.
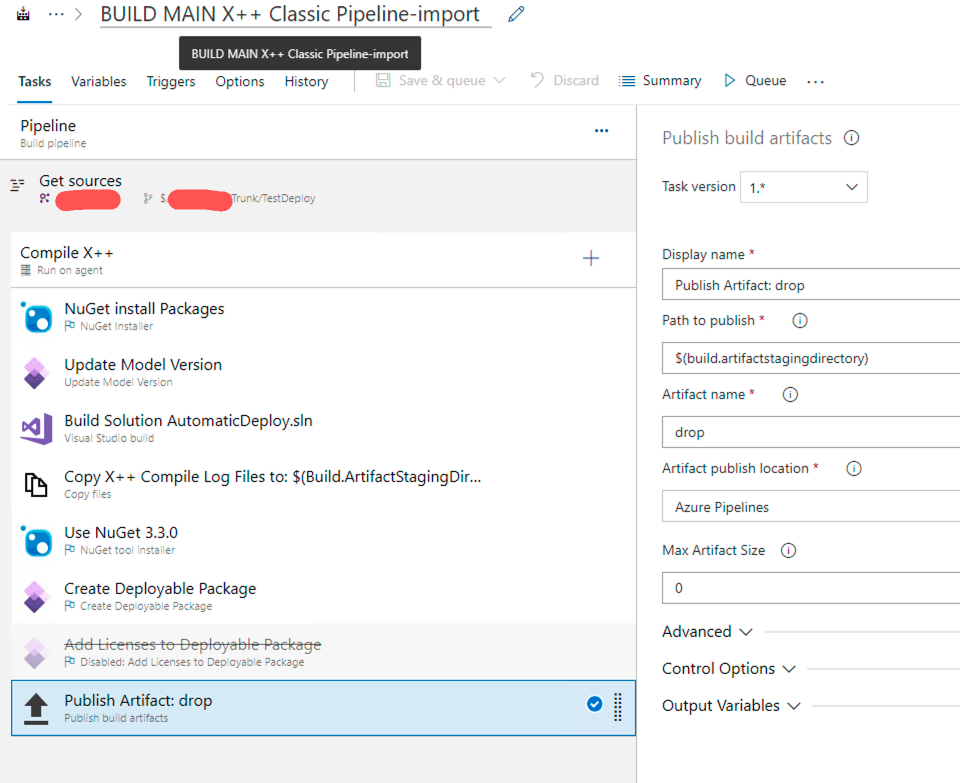
- Publish artifact: Send the deployable package to artifacts.
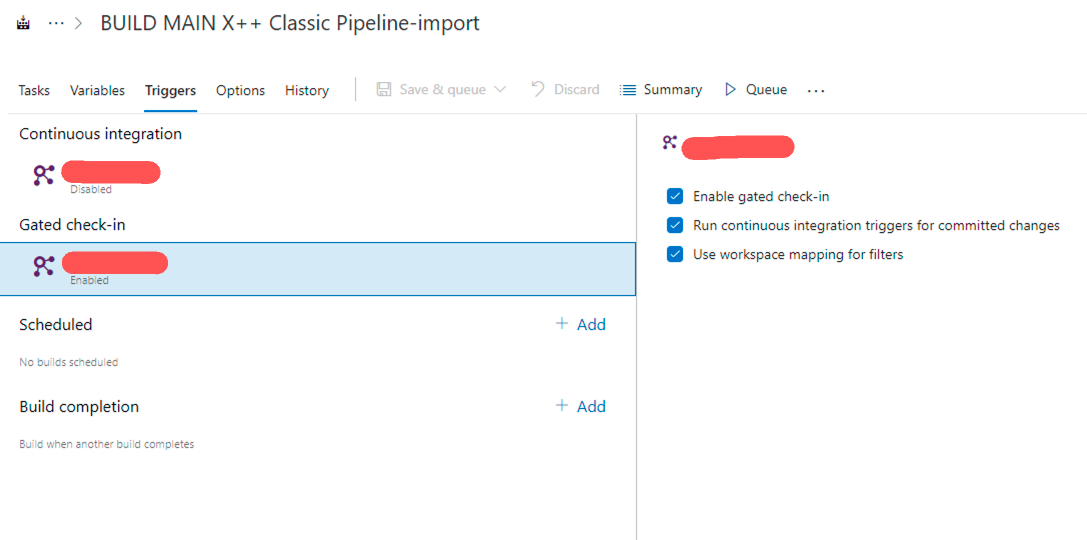
That’s it, with these steps we have a deployable package to be released. But there are other configurations that we can do, like how to trigger the pipeline. For that, select the best choice in the triggers tab. Talking about the options available, gated checkin performs validation on the change prior to it being committed to version control, whereas CI verifies a change after it is checked in. So you can choose what is the best choice for you.
Azure Release
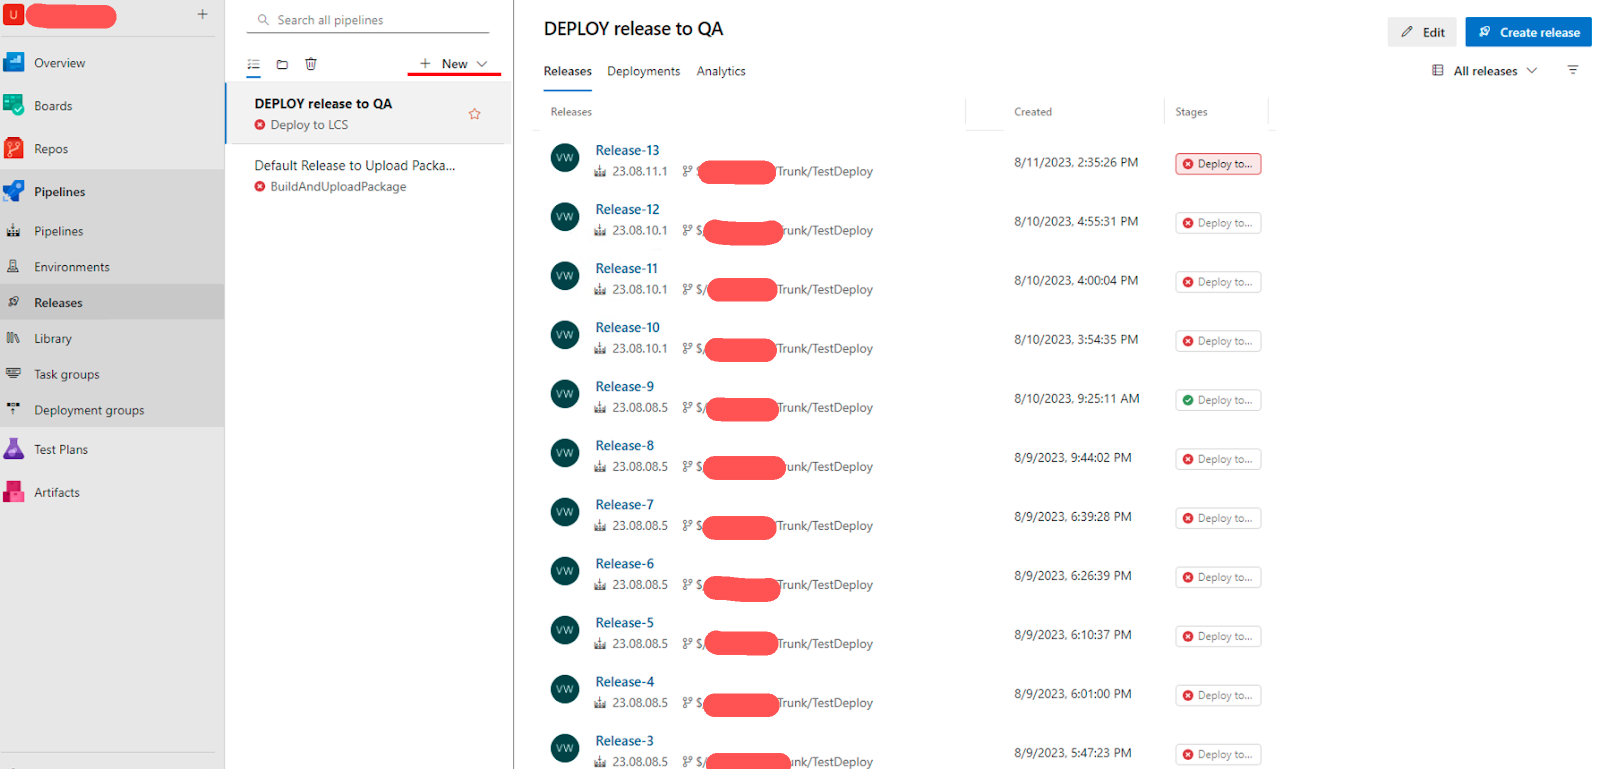
The released pipeline is responsible for deploying the new package to LCS. The first step is to create a new release in the DevOps main menu.
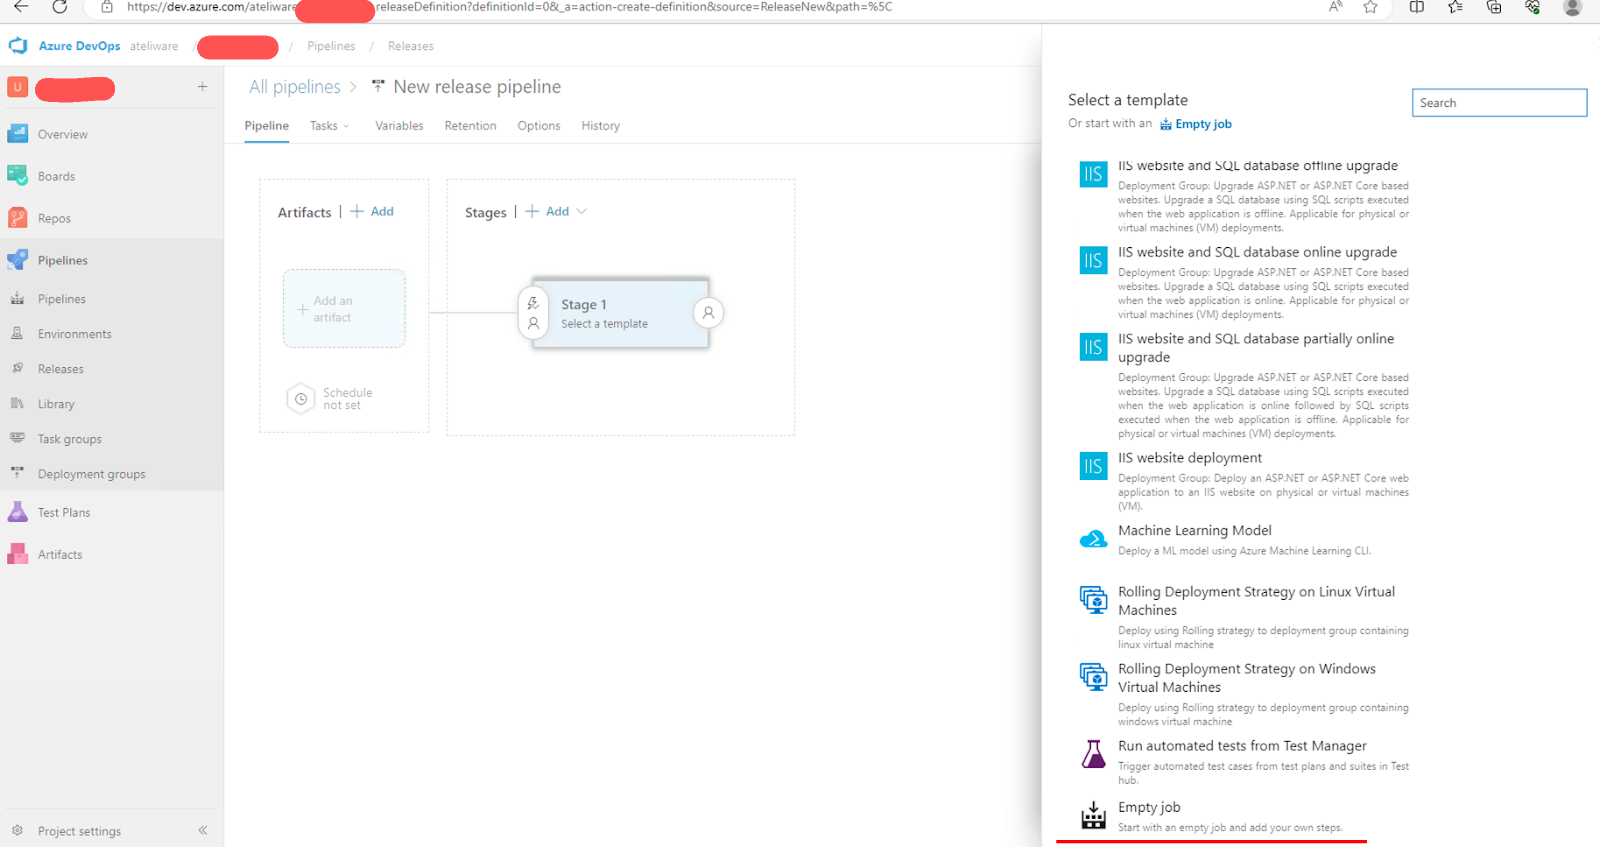
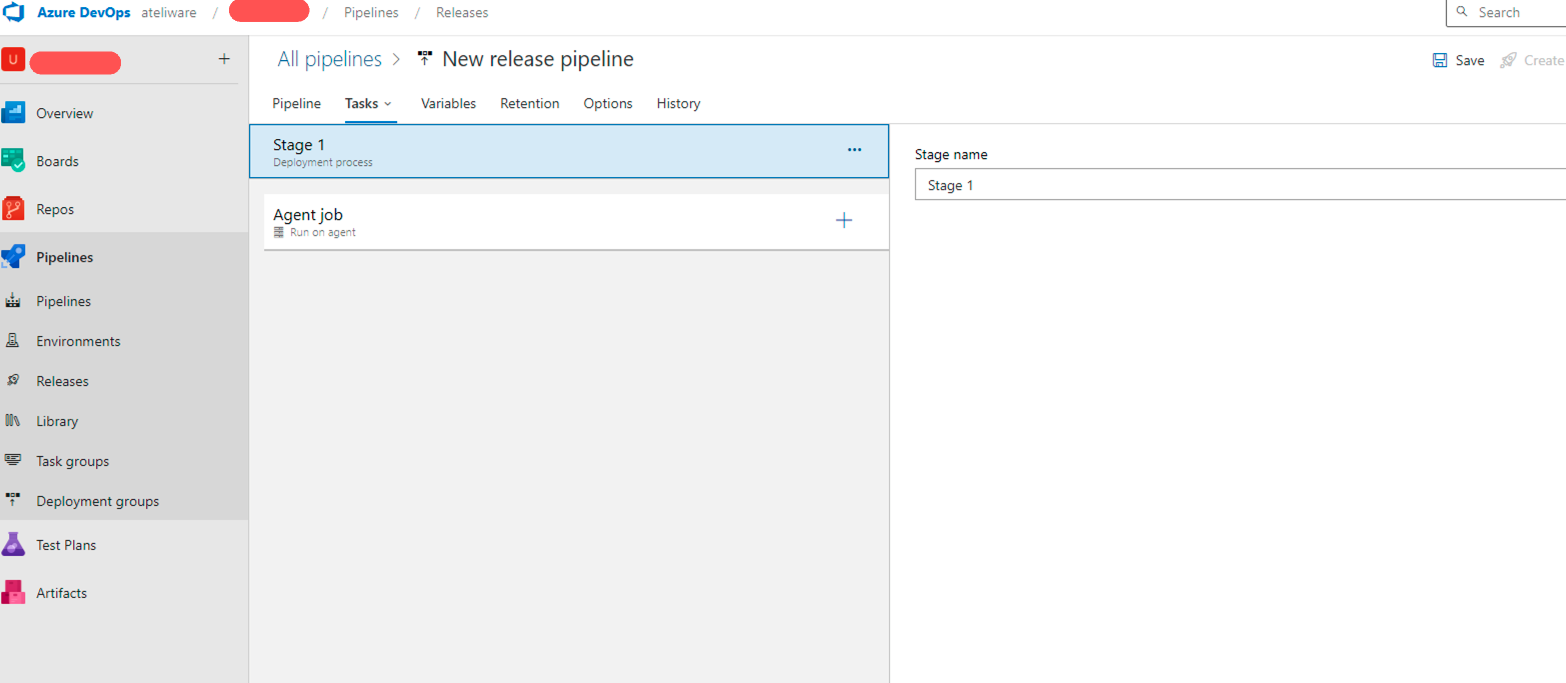
Select the option empty job.
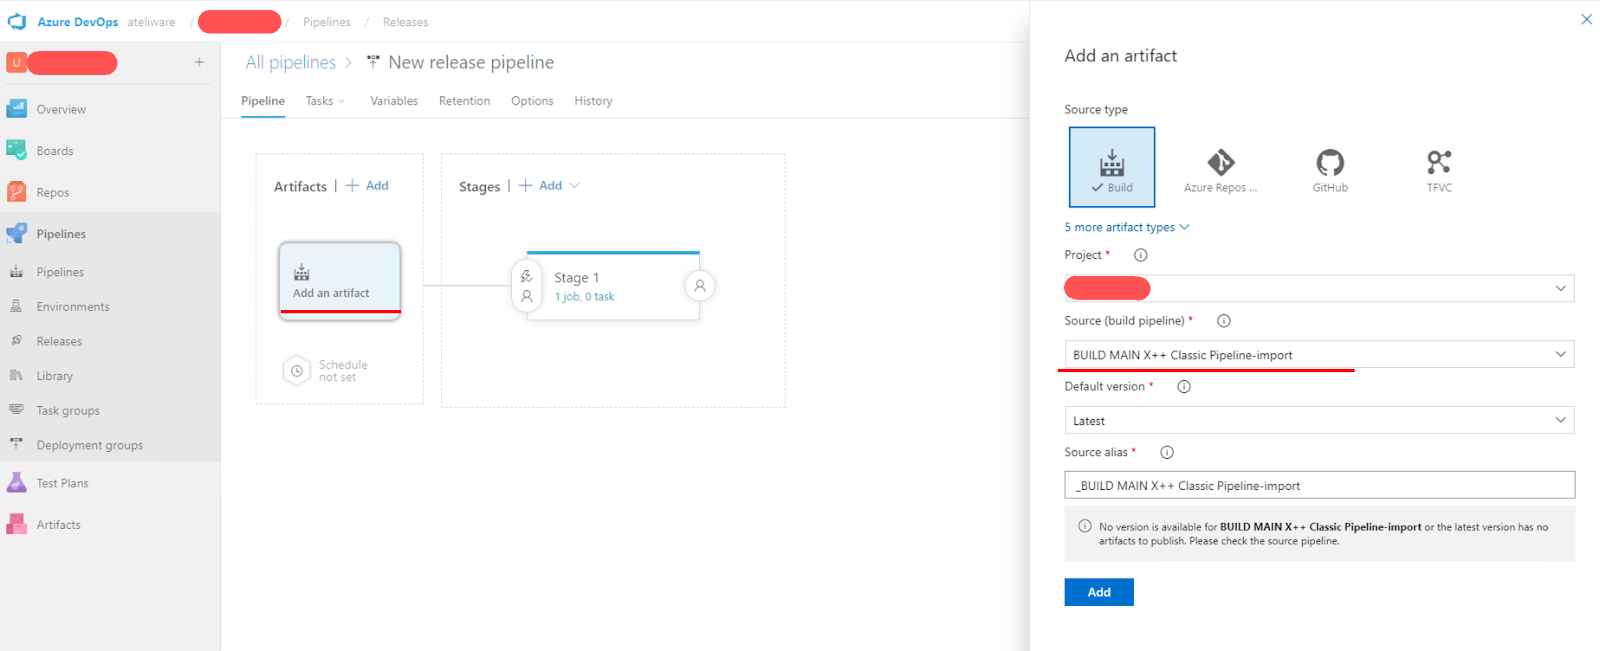
Select the package source.
Name the pipeline.
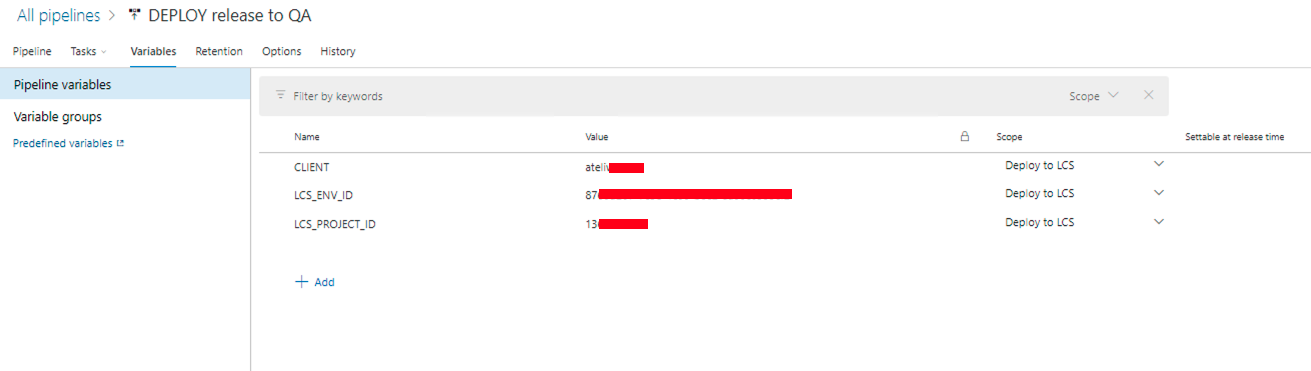
Create environment variables to pass the LCS secrets.
Define the pipeline stage name.
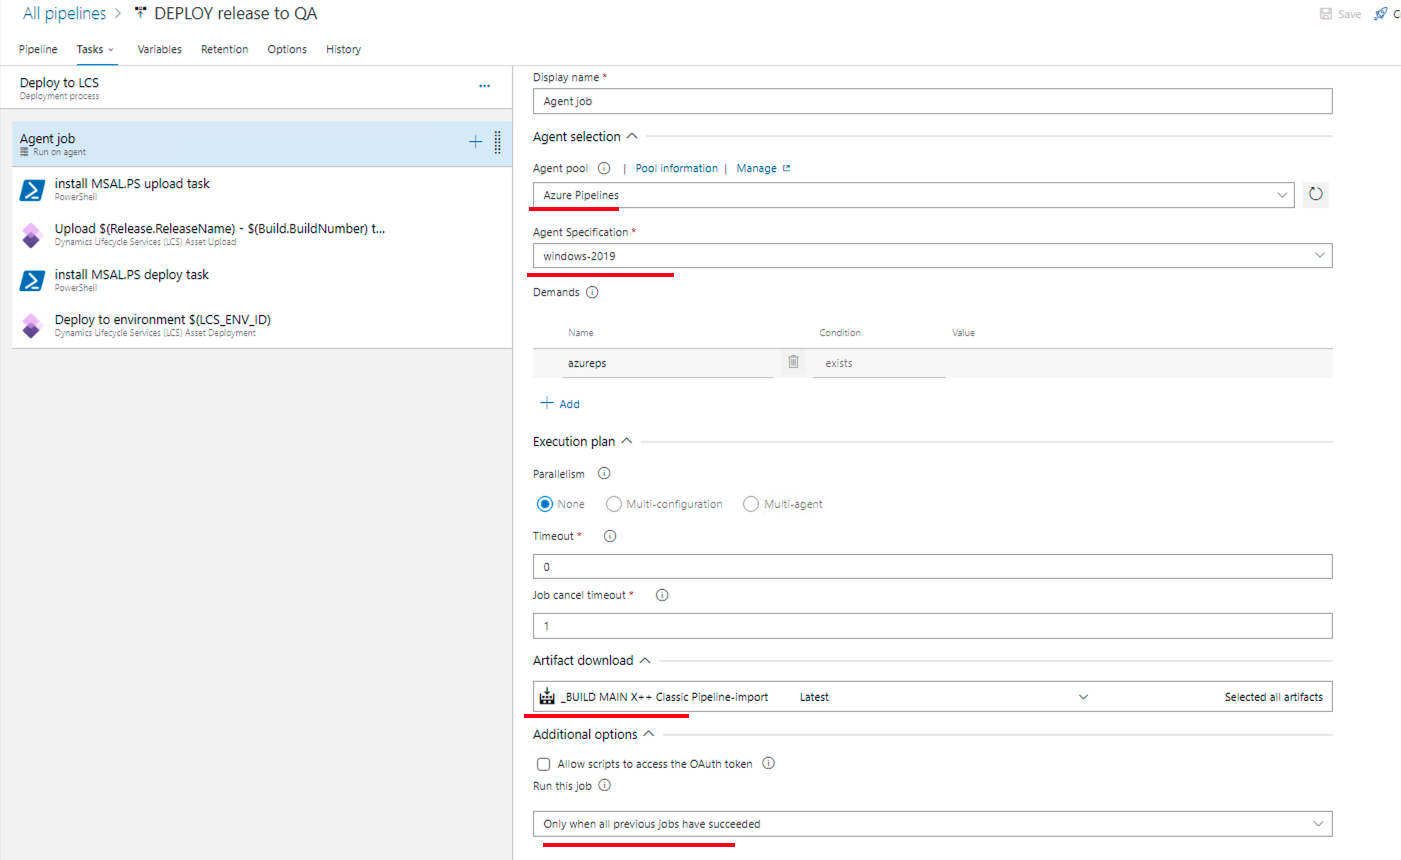
Configure the agent.
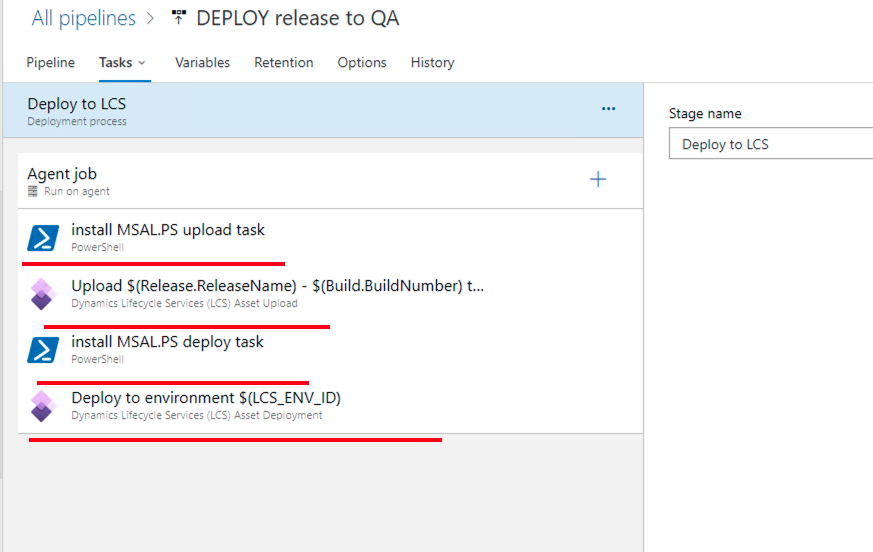
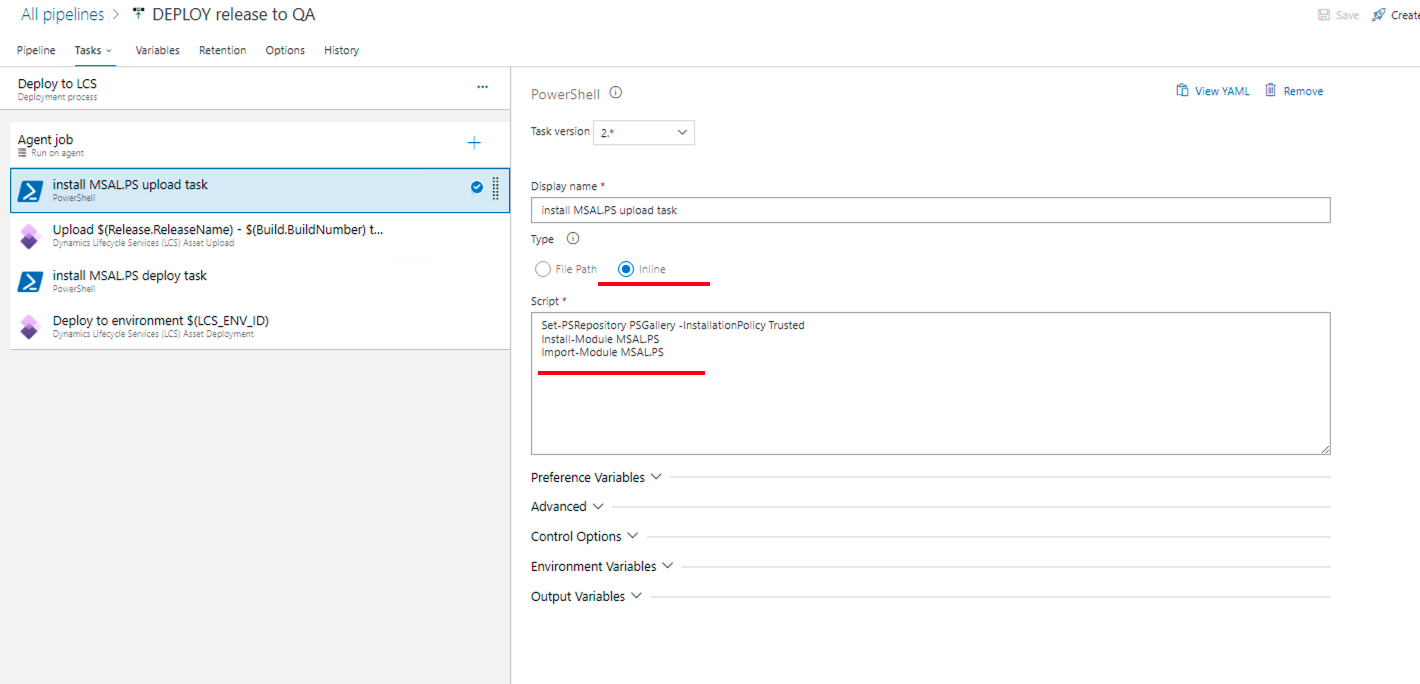
- Install MSALPS: Create a one liner to install the MSALPS. I installed it in each step of the integration with LCS to avoid any trouble.
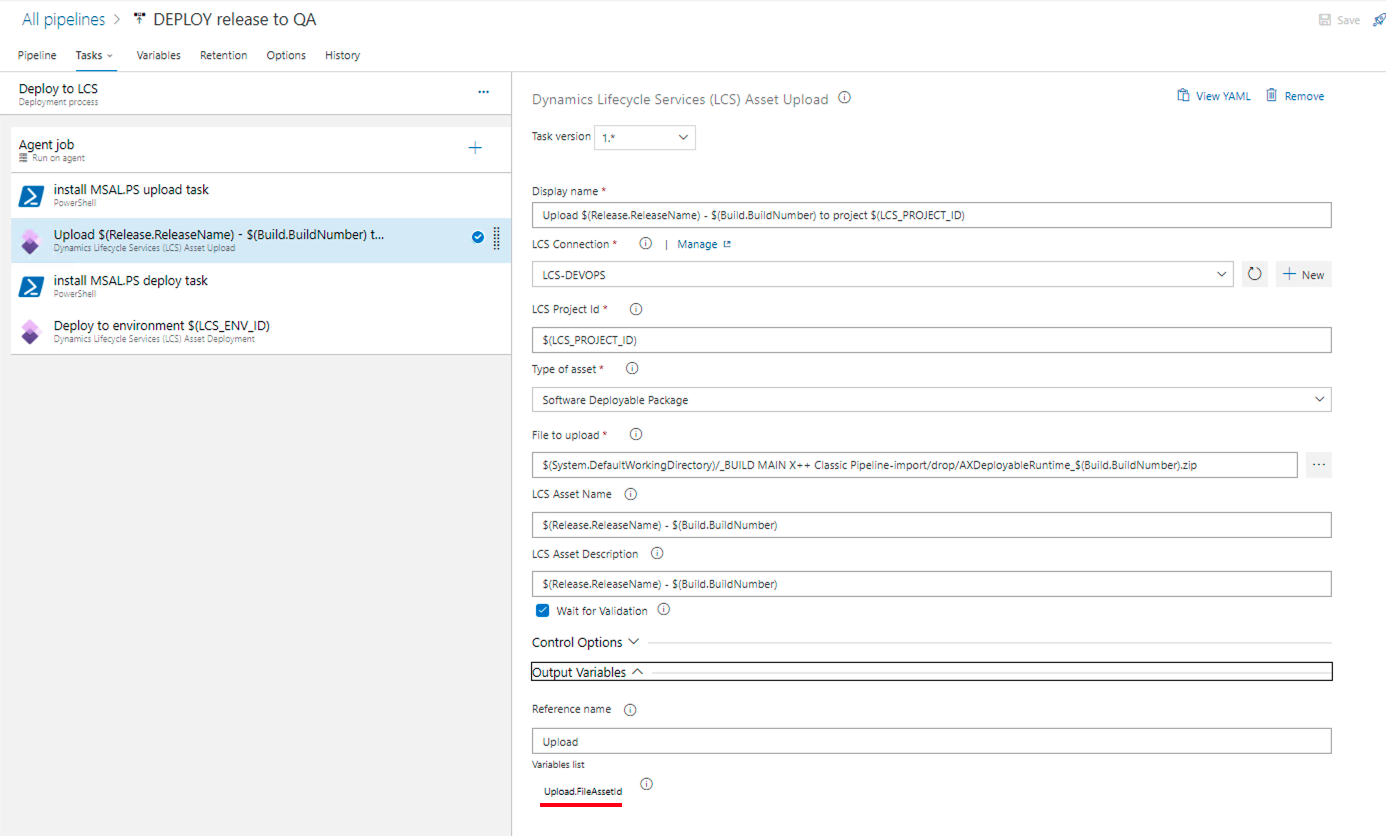
- Dynamics LCS asset upload: Upload the package to the LCS. Don’t forget to create the reference name. It will be used to identify assets in the LCS deploy stage.
Install MSALPS: Copy the previous task.
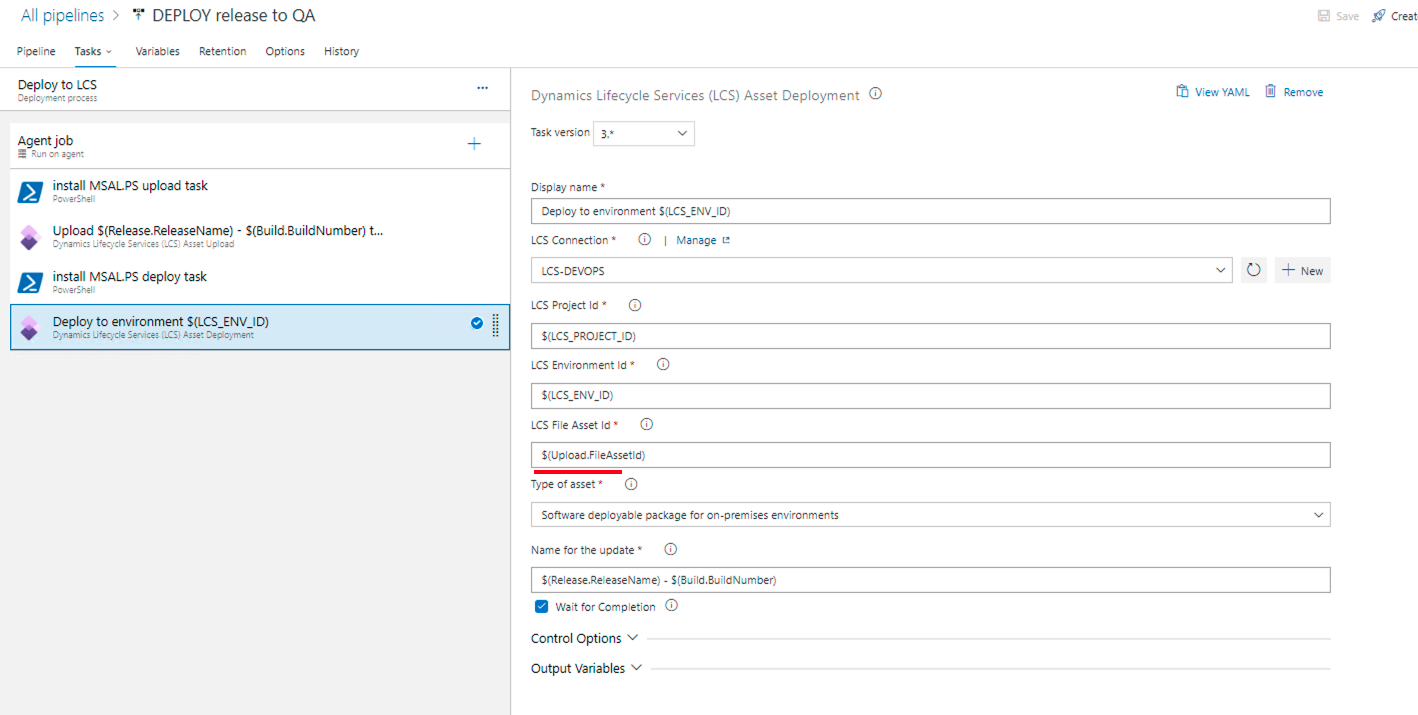
Dynamics LCS asset deployment: Deploy the package to LCS. Note that in the LCS asset id we have the reference name used on the upload step.
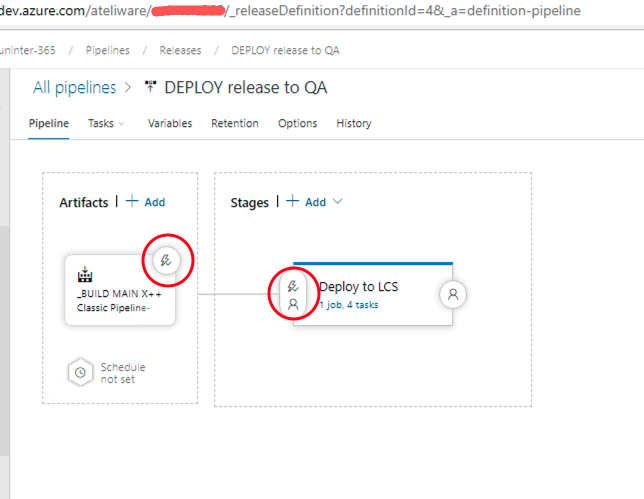
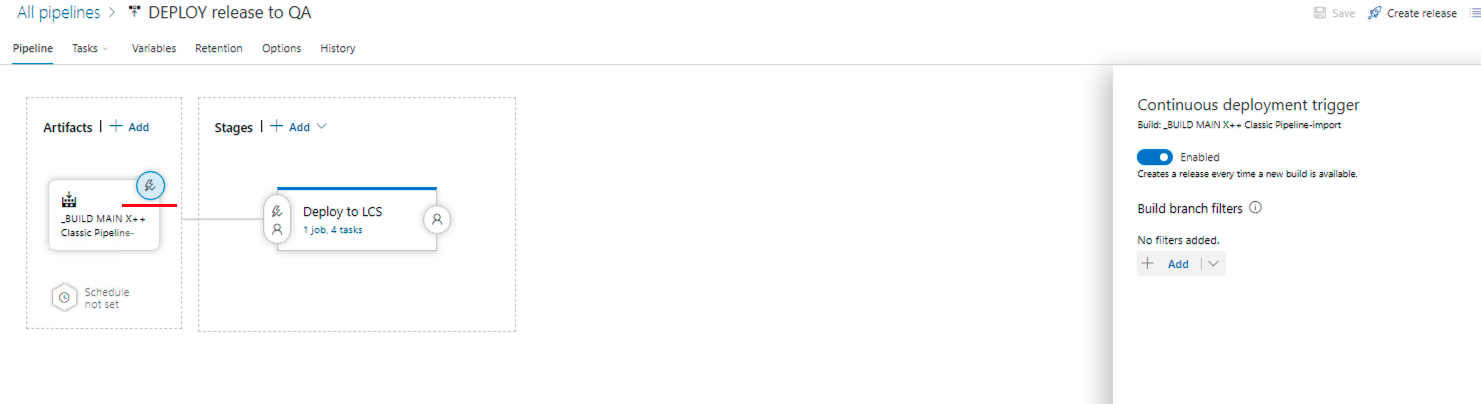
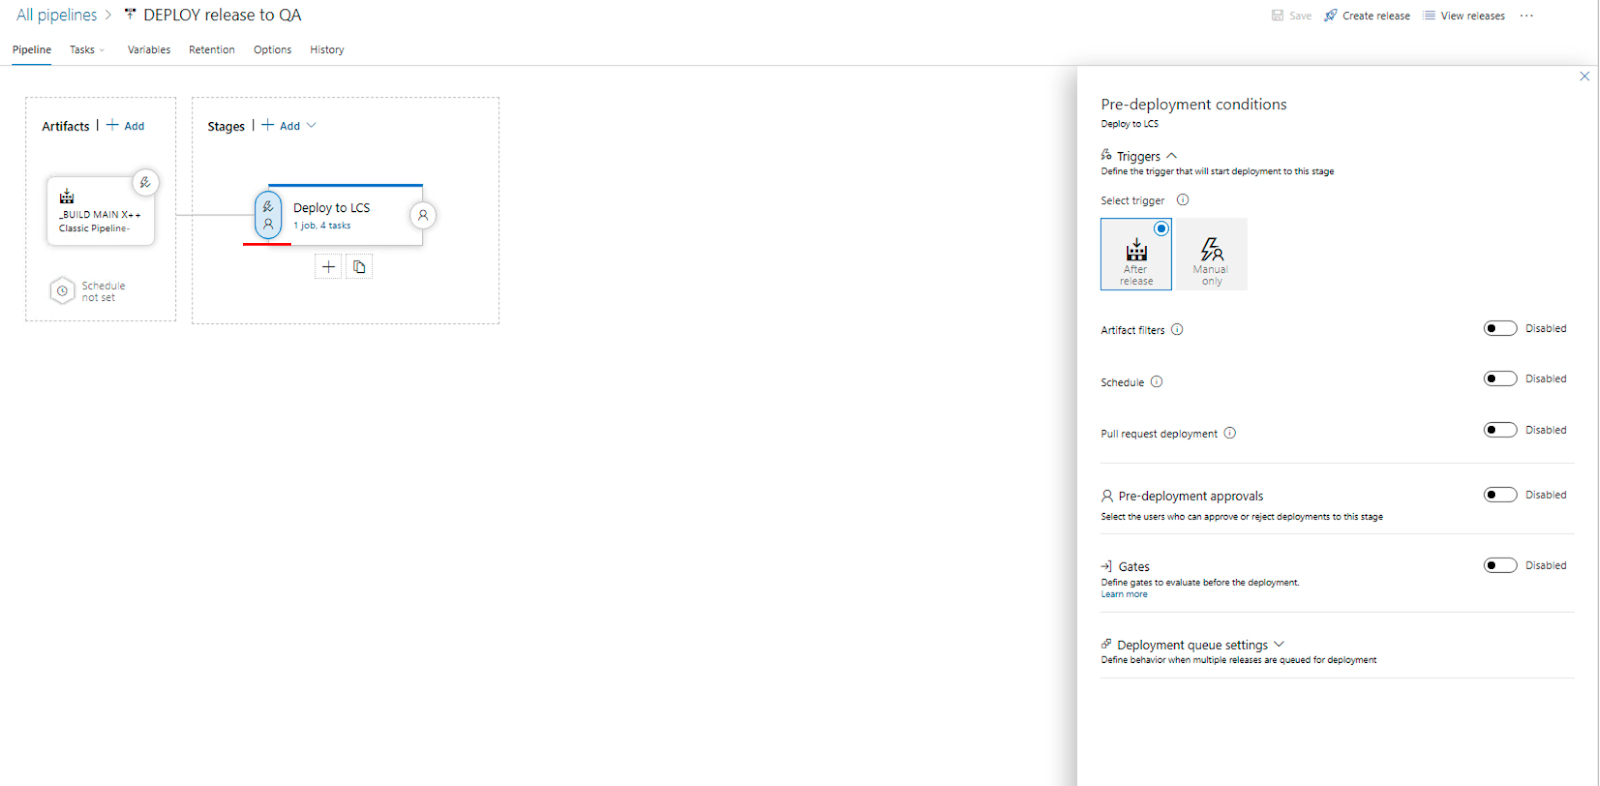
- Release triggers: Defines how the reselase pipeline will be triggered.
Final Considerations
This is an example of the main features needed to implement a deploy pipeline with Azure DevOps , D365FO and LCS . It’s a good starting point to be adapted to your needs. Hope you guys enjoy it.https://blog.ateliware.com/wp-content/uploads/2024/02/4-1.png
Software Engineer | Pós-Doutor em Bioinformática com mais de 10 anos na área de biotecnologia e análise de dados. Apaixonado pela família e esportes a motor.

ReactJS: validação de formulário com React Hook Form
Lidar com diversas telas e formulários enquanto se garante a validação de todos os campos pode se transformar em um trabalho repetitivo e cansativo. Pensando nisso, trouxemos uma visão de como os hooks do react podem auxiliar você na fluidez desse processo. + leia mais