How I Developed My Own 2D Procedural World Generation

Some years ago, I embarked on a journey to study 2D procedural world generation. At first, I experimented with creating simple structures using 2x2 matrices and generic lists to store random values inside the Unity3D engine. However, I quickly realized that this approach was not sufficient for generating large-scale structures.
During my journey studying 2D procedural world generation, I came across a powerful algorithm called Perlin Noise. Developed by Ken Perlin, Perlin Noise is a type of gradient noise that has the ability to generate complex and intricate patterns with a relatively small amount of computational resources.
This was a significant breakthrough in the field of procedural generation as it opened up the possibility of creating an almost unlimited variety of textures, terrains, and other procedurally generated content. With Perlin Noise, it became possible to create vast and detailed virtual worlds that were previously unattainable with traditional methods.And here you're going to check it out what I've done to build my own 2D procedural world generation.Perlin Noise
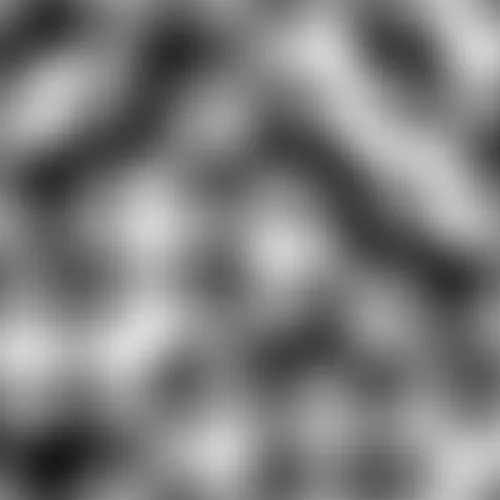
Perlin Noise is essentially a 2D float[,] matrix that is generated at runtime, containing values between 0.0f and 1.0f. By converting this matrix into a Texture2D, we can visualize it as a grayscale image, where darker areas correspond to values close to 0.0f and lighter areas correspond to values close to 1.0f. This allows us to easily create various types of procedural textures, such as clouds, marble, wood, and more. The resulting textures can be used as height maps or other types of maps in game engines or other applications, providing a powerful tool for generating natural-looking environments and objects. Here is an example of what such a texture might look like:
Terrain Generation
Implementing the Perlin Noise algorithm is relatively simple, and there are many resources available online to help you get started. If you’re having trouble, feel free to ask ChatGPT for assistance.
Here’s a snippet of my implementation of the Perlin Noise algorithm, which I use to generate terrain noise maps in Unity:
/// <summary>
/// Generates Perlin Noise matrix.
/// </summary>
/// <param name="width">Matrix width in pixels</param>
/// <param name="height">Matrix height in pixels</param>
/// <param name="scale">Zoom value in Perlin Noise</param>
/// <param name="octaves">Provides an smooth generation</param>
/// <param name="position">Point of generation</param>
/// <returns>float[,] matrix of Perlin Noise generation</returns>
public static float[,] GenerateNoiseMap(int width, int height, float scale,
 int octaves, Vector2 position)
{
float[,] noiseMap = new float[width, height];
for (int y = 0; y < height; y++)
{
for (int x = 0; x < width; x++)
{
float sampleX = (float)x / width * scale;
float sampleY = (float)y / height * scale;
float noise = 0f;
float frequency = 0f;
for (int oct = 1; oct < octaves; oct *= 2)
{
frequency += 1f / oct;
noise += (1f / oct) * Mathf.PerlinNoise(oct * (sampleX + (position.x * scale)),
 oct * (sampleY + (position.y * scale)));
}
noise = noise / frequency;
noiseMap[x, y] = noise;
}
}
return noiseMap;
}
Once you’ve generated the noise map using the GenerateNoiseMap function, you can use it to create terrain, textures, or other types of procedural content. For example, if you generate a float[30,30] noise map based on the player’s world position (represented as a Vector2), you might end up with an output that looks something like this:
Terrain Normalization
Once we have the output of the GenerateNoiseMap function, we can determine the 2D world block structure of the terrain. We can consider values higher than 0.5f as ground points and values less than or equal to 0.5f as empty points. To have a nice visualization of the generation, we can set the ground points as 1 (lighter) and the empty points as 0 (darker), which will help us to create a height map or a binary image of the terrain.
public enum BlockType : int
{
Empty = 0,
Ground = 1,
}
/// <summary>
/// Normalize terrain noise
/// </summary>
/// <param name="terrainMap">Perlin Noise matrix</param>
/// <param name="mountainNormalizationHeight">Terrain height limit generation</param>
/// <param name="position">Position of terrainMap generation</param>
/// <param name="scale">Scale of terrainMap generation</param>
/// <returns>Normalized noise map</returns>
public static float[,] NormalizeTerrain(
float[,] terrainMap, float mountainNormalizationHeight, Vector2 position, float scale
)
{
int width = terrainMap.GetLength(0);
int height = terrainMap.GetLength(1);
for (int y = 0; y < height; y++)
{
for (int x = 0; x < width; x++)
{
float sampleY = (float)y / height * scale;
if((sampleY + (position.y * scale)) < mountainNormalizationHeight)
terrainMap[x, y] = terrainMap[x, y] > 0.5f ? (int)BlockType.Ground :
(int)BlockType.Empty;
else
terrainMap[x, y] = (int)BlockType.Empty;
}
}
return terrainMap;
}
Let’s take a look at a visual representation of the normalized terrain. This image will show us the terrain blocks based on the values generated by the Perlin Noise algorithm, where lighter blocks represent higher values and darker blocks represent lower values.
Biome Generation
The idea of biome generation is similar to terrain generation. To achieve this, we need to modify the zoom level of the Perlin Noise algorithm. To implement this, we can call the GenerateNoiseMap function with the same parameters as the terrain generation, except for the scale value. The scale parameter determines the size of the biomes. If we want smaller biomes, we need to increase the scale parameter, while if we want larger biomes, we need to decrease it. This will produce the map with different scales, but with the same terrain structure.
Biome Normalization
Now we just need to normalize the output of the GenerateNoiseMap function that provides us with the biome map. Values less than 0.3f represent a snow biome (3), values greater or equal to 0.3f and less than 0.7f represent a forest biome (1), and values greater or equal to 0.7f represent a desert biome (2). The specific values used to determine the biome categories can be adjusted according to your generation’s goals.
We can get an idea of the process with the code snippet below.
public enum BiomeType : int
{
Forest = 1,
Desert = 2,
Snow = 3,
}
/// <summary>
/// Normalize biome noise map
/// </summary>
/// <param name="biomeMap">Noise map of the biome</param>
/// <returns>Normalized biome map</returns>
public static float[,] NormalizeBiome(
float[,] biomeMap
)
{
int width = biomeMap.GetLength(0);
int height = biomeMap.GetLength(1);
for (int y = 0; y < height; y++)
{
for (int x = 0; x < width; x++)
{
if(biomeMap[x, y] < 0.3f)
biomeMap[x, y] = (int)BiomeType.Snow;
else if(biomeMap[x, y] < 0.7f)
biomeMap[x, y] = (int)BiomeType.Forest;
else
biomeMap[x, y] = (int)BiomeType.Desert;
}
}
return biomeMap;
}
Let’s see a visual representation of the normalized biome with the same position of the normalized terrain. In the representation, blue represents the snow biome, green represents the forest biome, and yellow represents the desert biome. This visualization helps us understand how the biome generation algorithm is working and how the different biomes are distributed throughout the terrain. It’s worth noting that the color scheme and distribution of biomes can be customized to fit the specific needs of your project.
Merge Terrain with Biome
To merge the **terrain map **with the biome map, we need to iterate through the terrain map and check if each block is not empty. If it isn’t, we check the corresponding index in the biome map to get the biome type for that particular block. This can be easily achieved with a nested loop that iterates through each row and column of the terrain map. We can then use the current loop index to access the corresponding value in both the terrain and biome maps.
For example, let’s say we have a 2D array representing our terrain map called terrain map and a 2D array representing our biomeMap called biome map. We can iterate through both maps using a nested loop like this:
/// <summary>
/// Merge terrain with biome
/// </summary>
/// <param name="terrainMap">Terrain Map</param>
/// <param name="biomeMap">Biome Map</param>
/// <returns>Merged terrain with biome</returns>
public static float[,] MergeTerrainWithBiome(
float[,] terrainMap, float[,] biomeMap
)
{
int width = terrainMap.GetLength(0);
int height = terrainMap.GetLength(1);
for (int y = 0; y < height; y++)
{
for (int x = 0; x < width; x++)
{
if(terrainMap[x, y] == 1)
terrainMap[x, y] = biomeMap[x, y];
}
}
return terrainMap;
}
Now we can see the terrain with the biome map applied, where each block is colored according to its corresponding biome type. The snow biome blocks are painted blue, the forest biome blocks are painted green, and the desert biome blocks are painted yellow. This gives the terrain a more realistic and diverse look, as different parts of the terrain now have distinct characteristics based on their corresponding biomes.
Texture Generation
Here are some examples of texture generation, which can be very helpful for debugging and understanding what is going on while you are coding your game. In order to generate textures from a float[,] map, you first need to convert the float[,] map into a Color[,] map.
Terrain Map Texture
Terrain texture in black and white color.
/// <summary>
/// Generate terrain map texture
/// </summary>
/// <param name="terrainMap">Terrain map</param>
/// <returns>Terrain map texture</returns>
public static Texture2D TerrainTextureFromHeightMap(float[,] terrainMap)
{
int _width = terrainMap.GetLength(0);
int _height = terrainMap.GetLength(1);
Color[] colourMap = new Color[_width * _height];
for (int y = 0; y < _height; y++)
{
for (int x = 0; x < _width; x++)
{
colourMap[(y * _width) + x] = Color.Lerp(Color.black, Color.white, terrainMap[x, y]);
}
}
Texture2D texture = new Texture2D(_width, _height);
texture.filterMode = FilterMode.Point;
texture.wrapMode = TextureWrapMode.Repeat;
texture.SetPixels(colourMap);
texture.Apply();
return texture;
}
Biome Map Texture
Terrain/Biome texture based on biome color.
/// <summary>
/// Generate biome map texture
/// </summary>
/// <param name="BiomeMap">Biome map</param>
/// <returns>Biome map texture</returns>
public static Texture2D BiomeTextureFromHeightMap(float[,] biomeMap)
{
int _width = biomeMap.GetLength(0);
int _height = biomeMap.GetLength(1);
Color[] colourMap = new Color[_width * _height];
for (int y = 0; y < _height; y++)
{
for (int x = 0; x < _width; x++)
{
Color _color;
if(biomeMap[x, y] == (int)PerlinNoise.BiomeType.Forest)
_color = Color.green;
else if(biomeMap[x, y] == (int)PerlinNoise.BiomeType.Desert)
_color = Color.yellow;
else if(biomeMap[x, y] == (int)PerlinNoise.BiomeType.Snow)
_color = Color.blue;
else
_color = Color.black;
colourMap[(y * _width) + x] = _color;
}
}
Texture2D texture = new Texture2D(_width, _height);
texture.filterMode = FilterMode.Point;
texture.wrapMode = TextureWrapMode.Repeat;
texture.SetPixels(colourMap);
texture.SetPixel(texture.width / 2, texture.height / 2, Color.red);
texture.Apply();
return texture;
}
Conclusion
With these maps, you can iterate over each index of the terrain map and instantiate a block with a position based on the current index. This can be done using a nested loop that iterates over the x and y axes of the terrain map. For each index, you can check the corresponding biome type and use the appropriate texture for the block. Finally, you can instantiate the block at the correct position using the index as a reference. Here you can see an example of the result of this 2D procedural world generation done by me, with the terrain and biome maps combined to create a fully rendered world.
Check out the video here.
Software Engineer | Apaixonado por música, pets, gamedev e automação.

ReactJS: validação de formulário com React Hook Form
Lidar com diversas telas e formulários enquanto se garante a validação de todos os campos pode se transformar em um trabalho repetitivo e cansativo. Pensando nisso, trouxemos uma visão de como os hooks do react podem auxiliar você na fluidez desse processo. + leia mais

Dicas essenciais para manter um sistema em produção
Você ou seu cliente tiveram a ideia, o projeto foi parar em produção e o MVP deu certo. E agora? Sabemos que essa é uma dúvida que persiste até mesmo nos times mais experientes. Afinal, o tempo é curto, mas a quantidade de perrengues que seu produto pode enfrentar em produção, não. Nesse artigo, vou compartilhar alguns conselhos que aprendi construindo produtos que operam no mundo real aqui na ateliware. + leia mais